I saw an interesting article today. A DIY project installing Linux (albeit old Linux) on a really old 386SX laptop. It can't do very much, but it's one of those projects you tackle "because it's there."
You can check out the story here.
Showing posts with label Projects. Show all posts
Showing posts with label Projects. Show all posts
Saturday, August 13, 2011


Tuesday, May 18, 2010
Project: Getting Ready For Ubuntu 10.04 - Part 5
For our final installment, we're going to install and perform some basic configuration on our new Ubuntu 10.04 system.
Downloading The Install Image And Burning A Disk
We covered the process of getting the CD image and creating the install media in installment 3. The process is similar. You can download the CD image here. Remember to verify the MD5SUM of the disk you burn. We don't want to have a failed installation because of a bad disk. Also, be sure to read the 10.04 release notes to avoid any last minute surprises.
Last Minute Details
There may be a few files that we will want to transfer to the new system immediately, such as the package_list.old.txt file we created in installment 4 and each user's .bashrc file. Copy these files to a flash drive (or use Ubuntu One, if you're feeling adventuresome).
Install!
We're finally ready for the big moment. Insert the install disk and reboot. The install process is similar to previous Ubuntu releases.
Apply Updates
After the installation is finished and we have rebooted into our new system, the first thing we should do is apply all the available updates. When I installed last week, there were already 65 updates. Assuming that we have a working Internet connection, we can apply the updates with the following command:
me@linuxbox ~$ sudo apt-get update; sudo apt-get upgrade
Since the updates include a kernel update, reboot the system after the updates are applied.
Install Additional Packages
The next step is to install any additional software we want on the system. To help with this task, we created a list in installment 4 that contained the names of all of the packages on the old system. We can compare this list with the new system using the following script:
#!/bin/bash
# compare_packages - compare lists of packages
OLD_PACKAGES=~/package_list.old.txt
NEW_PACKAGES=~/package_list.new.txt
if [[ -r $OLD_PACKAGES ]]; then
dpkg --list | awk '$1 == "ii" {print $2}' > $NEW_PACKAGES
diff -y $OLD_PACKAGES $NEW_PACKAGES | awk '$2 == "<" {print $1}'
else
echo "compare_packages: $OLD_PACKAGES not found." >&2
exit 1
fi
This scripts produces a list of packages that were present on the old system but not yet on the new system. You will probably want to capture the output of this script and store it in a file:
me@linuxbox ~ $ compare_packages > missing_packages.txt
You should review the output and apply some editorial judgement as it is likely the list will contain many packages that are no longer used on the new system in addition to the packages that you do want to install. As you review the list, you can use the following command to get a description of a package:
apt-cache show package_name
Once you determine the final list of packages to be installed, you can install each package using the command:
sudo apt-get install package_name
or, if you are feeling especially brave, you can create a text file containing the list of desired packages to install and do them all at once:
me@linuxbox ~ $ sudo xargs apt-get install < package_list.txt
Create User Accounts
If your old system had multiple user accounts, you will want to recreate them before restoring the user home directories. You can create accounts with this command:
sudo adduser user
This command will create the user and group accounts for the specified user and create the user's home directory.
Restore The Backup
If you created your backup using the usb_backup script from installment 4 you can use this script to restore the /usr/local and /home directories:
#!/bin/bash
# usb_restore - restore directories from backup drive with rsync
BACKUP_DIR=/media/BigDisk/backup
ADDL_DIRS=".ssh"
sudo rsync -a $BACKUP_DIR/usr/local /usr
for h in /home/* ; do
user=${h##*/}
for d in $BACKUP_DIR$h/*; do
if [[ -d $d ]]; then
if [[ $d != $BACKUP_DIR$h/Examples ]]; then
echo "Restoring $d to $h"
sudo rsync -a "$d" $h
fi
fi
done
for d in $ADDL_DIRS; do
d=$BACKUP_DIR$h/$d
if [[ -d $d ]]; then
echo "Restoring $d to $h"
sudo rsync -a "$d" $h
fi
done
# Uncomment the following line if you need to correct file ownerships
#sudo chown -R $user:$user $h
done
You should adjust the value of the ADDL_DIRS constant to include hidden directories you want to restore, if any, as this script does not restore any directory whose name begins with a period to prevent restoration of configuration files and directories.
Another issue you will probably encounter is the ownership of user files. Unless the user ids of each of the users on old system match the user ids of the users on the new system, rsync will restore them with the user ids of the old system. To overcome this, uncomment the chown line near the end of the script.
If you made your backup using the usb_backup_ntfs script, use this script to restore the /usr/local and /home directories:
#!/bin/bash
# usb_restore_ntfs - restore directories from backup drive with tar
BACKUP_DIR=/media/BigDisk_NTFS/backup
cd /
sudo tar -xvf $BACKUP_DIR/usrlocal.tar
for h in /home/* ; do
user=${h##*/}
sudo tar -xv \
--seek \
--wildcards \
--exclude="home/$user/Examples" \
-f $BACKUP_DIR/home.tar \
"home/$user/[[:alnum:]]*" \
"home/$user/.ssh"
done
To append additional directories to the list to be restored, add more lines to the tar command using the "home/$user/.ssh" line as a template. Since tar restores user files using user names rather than user ids as rsync does, the ownership of the restored files is not a problem.
Enjoy!
Once the home directories are restored, each user should reconfigure their desktop and applications to their personal taste. Other than that, the system should be pretty much ready-to-go. Both of the backup methods provide the /etc directory from the old system for reference in case it's needed.
Further Reading
Man pages for the following commands:
Downloading The Install Image And Burning A Disk
We covered the process of getting the CD image and creating the install media in installment 3. The process is similar. You can download the CD image here. Remember to verify the MD5SUM of the disk you burn. We don't want to have a failed installation because of a bad disk. Also, be sure to read the 10.04 release notes to avoid any last minute surprises.
Last Minute Details
There may be a few files that we will want to transfer to the new system immediately, such as the package_list.old.txt file we created in installment 4 and each user's .bashrc file. Copy these files to a flash drive (or use Ubuntu One, if you're feeling adventuresome).
Install!
We're finally ready for the big moment. Insert the install disk and reboot. The install process is similar to previous Ubuntu releases.
Apply Updates
After the installation is finished and we have rebooted into our new system, the first thing we should do is apply all the available updates. When I installed last week, there were already 65 updates. Assuming that we have a working Internet connection, we can apply the updates with the following command:
me@linuxbox ~$ sudo apt-get update; sudo apt-get upgrade
Since the updates include a kernel update, reboot the system after the updates are applied.
Install Additional Packages
The next step is to install any additional software we want on the system. To help with this task, we created a list in installment 4 that contained the names of all of the packages on the old system. We can compare this list with the new system using the following script:
#!/bin/bash
# compare_packages - compare lists of packages
OLD_PACKAGES=~/package_list.old.txt
NEW_PACKAGES=~/package_list.new.txt
if [[ -r $OLD_PACKAGES ]]; then
dpkg --list | awk '$1 == "ii" {print $2}' > $NEW_PACKAGES
diff -y $OLD_PACKAGES $NEW_PACKAGES | awk '$2 == "<" {print $1}'
else
echo "compare_packages: $OLD_PACKAGES not found." >&2
exit 1
fi
This scripts produces a list of packages that were present on the old system but not yet on the new system. You will probably want to capture the output of this script and store it in a file:
me@linuxbox ~ $ compare_packages > missing_packages.txt
You should review the output and apply some editorial judgement as it is likely the list will contain many packages that are no longer used on the new system in addition to the packages that you do want to install. As you review the list, you can use the following command to get a description of a package:
apt-cache show package_name
Once you determine the final list of packages to be installed, you can install each package using the command:
sudo apt-get install package_name
or, if you are feeling especially brave, you can create a text file containing the list of desired packages to install and do them all at once:
me@linuxbox ~ $ sudo xargs apt-get install < package_list.txt
Create User Accounts
If your old system had multiple user accounts, you will want to recreate them before restoring the user home directories. You can create accounts with this command:
sudo adduser user
This command will create the user and group accounts for the specified user and create the user's home directory.
Restore The Backup
If you created your backup using the usb_backup script from installment 4 you can use this script to restore the /usr/local and /home directories:
#!/bin/bash
# usb_restore - restore directories from backup drive with rsync
BACKUP_DIR=/media/BigDisk/backup
ADDL_DIRS=".ssh"
sudo rsync -a $BACKUP_DIR/usr/local /usr
for h in /home/* ; do
user=${h##*/}
for d in $BACKUP_DIR$h/*; do
if [[ -d $d ]]; then
if [[ $d != $BACKUP_DIR$h/Examples ]]; then
echo "Restoring $d to $h"
sudo rsync -a "$d" $h
fi
fi
done
for d in $ADDL_DIRS; do
d=$BACKUP_DIR$h/$d
if [[ -d $d ]]; then
echo "Restoring $d to $h"
sudo rsync -a "$d" $h
fi
done
# Uncomment the following line if you need to correct file ownerships
#sudo chown -R $user:$user $h
done
You should adjust the value of the ADDL_DIRS constant to include hidden directories you want to restore, if any, as this script does not restore any directory whose name begins with a period to prevent restoration of configuration files and directories.
Another issue you will probably encounter is the ownership of user files. Unless the user ids of each of the users on old system match the user ids of the users on the new system, rsync will restore them with the user ids of the old system. To overcome this, uncomment the chown line near the end of the script.
If you made your backup using the usb_backup_ntfs script, use this script to restore the /usr/local and /home directories:
#!/bin/bash
# usb_restore_ntfs - restore directories from backup drive with tar
BACKUP_DIR=/media/BigDisk_NTFS/backup
cd /
sudo tar -xvf $BACKUP_DIR/usrlocal.tar
for h in /home/* ; do
user=${h##*/}
sudo tar -xv \
--seek \
--wildcards \
--exclude="home/$user/Examples" \
-f $BACKUP_DIR/home.tar \
"home/$user/[[:alnum:]]*" \
"home/$user/.ssh"
done
To append additional directories to the list to be restored, add more lines to the tar command using the "home/$user/.ssh" line as a template. Since tar restores user files using user names rather than user ids as rsync does, the ownership of the restored files is not a problem.
Enjoy!
Once the home directories are restored, each user should reconfigure their desktop and applications to their personal taste. Other than that, the system should be pretty much ready-to-go. Both of the backup methods provide the /etc directory from the old system for reference in case it's needed.
Further Reading
Man pages for the following commands:
- apt-cache
- apt-get
- adduser
- xargs
Saturday, May 15, 2010
Project: Getting Ready For Ubuntu 10.04 - Part 4a
After some experiments and benchmarking, I have modified the usb_backup_ntfs script presented in the last installment to remove compression. This cuts the time needed to perform the backup using this script by roughly half. The previous script works, but this one is better:
#!/bin/bash
# usb_backup_ntfs # backup system to external disk drive
SOURCE="/etc /usr/local /home"
NTFS_DESTINATION=/media/BigDisk_NTFS/backup
if [[ -d $NTFS_DESTINATION ]]; then
for i in $SOURCE ; do
fn=${i//\/}
sudo tar -cv \
--exclude '/home/*/.gvfs' \
-f $NTFS_DESTINATION/$fn.tar $i
done
fi
#!/bin/bash
# usb_backup_ntfs # backup system to external disk drive
SOURCE="/etc /usr/local /home"
NTFS_DESTINATION=/media/BigDisk_NTFS/backup
if [[ -d $NTFS_DESTINATION ]]; then
for i in $SOURCE ; do
fn=${i//\/}
sudo tar -cv \
--exclude '/home/*/.gvfs' \
-f $NTFS_DESTINATION/$fn.tar $i
done
fi
Further Reading
Other installments in this series: 1 2 3 4 4a 5
Tuesday, May 11, 2010
Project: Getting Ready For Ubuntu 10.04 - Part 4
Despite my trepidations, I'm going to proceed with the upgrade to Ubuntu 10.04. I've already upgraded my laptop and with Sunday's release of an improved totem movie player, the one "show stopper" bug has been addressed. I can live with/work around the rest. The laptop does not contain much permanent data (I use it to write and collect images from my cameras when I travel) so wiping the hard drive and installing a new OS is not such a big deal. My desktop system is another matter. I store a lot of stuff on it and have a lot of software installed, too. I've completed my testing using one of my test computers verifying that all of the important apps on the system can be set up and used in a satisfactory manner, so in this installment we will look at preparing the desktop system for installation of the new version of Ubuntu.
Creating A Package List
In order to get a grip on the extra software I have installed on my desktop, I started out just writing a list of everything I saw in the desktop menus that did not appear on my 10.04 test systems. This is all the obvious stuff like Thunderbird, Gimp, Gthumb, etc., but what about the stuff that's not on the menu? I know I have installed many command line programs too. To get a complete list of the software installed on the system, we'll have to employ some command line magic:
me@twin7$ dpkg --list | awk '$1 == "ii" {print $2}' > ~/package_list.old.txt
This creates a list of all of the installed packages on the system and stores it in a file. We'll use this file to compare the package set with that of the new OS installation.
Making A Backup
The most important task we need to accomplish before we install the new OS is backing up the important data on the system for later restoration after the upgrade. For me, the files I need to preserve are located in /etc (the system's configuration files. I don't restore these, but keep them for reference), /usr/local (locally installed software and administration scripts), and /home (the files belonging to the users). If you are running a web server on your system, you will also probably need to backup portions of the /var directory as well.
There are many ways to perform backups. My systems normally backup every night to a local file server on my network, but for this exercise we'll use an external USB hard drive. We'll look at two popular methods: rsync and tar.
The choice of method depends on your needs and on how your external hard drive is formatted. The key feature afforded by both methods is that they preserve the attributes (permissions, ownerships, modification times, etc.) of the files being backed up. Another feature they both offer is the ability to exclude files from the backup because there are a few things that we don't want.
The rsync program copies files from one place to another. The source or destination may be a network drive, but for our purposes we will use a local (though external) volume. The great advantage of rsync is that once an initial copy is performed, subsequent updates can be made very rapidly as rsync only copies the changes made since the previous copy. The disadvantage of rsync is that the destination volume has to have a Unix-like file system since it relies on it to store the file attributes.
Here we have a script that will perform the backup using rsync. It assumes that we have an ext3 formatted file system on a volume named BigDisk and that the volume has a backup directory:
#!/bin/bash
# usb_backup - Backup system to external disk drive using rsync
SOURCE="/etc /usr/local /home"
EXT3_DESTINATION=/media/BigDisk/backup
if [[ -d $EXT3_DESTINATION ]]; then
sudo rsync -av \
--delete \
--exclude '/home/*/.gvfs' \
$SOURCE $EXT3_DESTINATION
fi
The script first checks that the destination directory exists and then performs rsync. The --delete option removes files on the destination that do not exist on the source. This way a perfect mirror of the source is maintained. We also exclude any .gvfs directories we encounter. They cause problems. This script can be used as a routine backup procedure. Once the initial backup is performed, later backups will be very fast since rsync identifies and copies only files that have changed between backups.
Our second approach uses the tar program. tar (short for tape archive) is a traditional Unix tool used for backups. While its original use was for writing files on magnetic tape, it can also write ordinary files. tar works by recording all of the source files into a single archive file called a tar file. Within the tar file all of the source file attributes are recorded along with the file contents. Since tar does not rely on the native file system of the backup device to store the source file attributes, it can use any Linux-supported file system to store the archive. This makes tar the logical choice if you are using an off-the-shelf USB hard drive formatted as NTFS. However, tar has a significant disadvantage compared to rsync. It is extremely cumbersome to restore single files from an archive if the archive is large.
Since tar writes its archives as though it were writing to magnetic tape, the archives are a sequential access medium. This means to find something in the archive, tar must read through the entire archive starting from the beginning to retrieve the information. This is opposed to a direct access medium such as a hard disk where the system can rapidly locate and retrieve a file directly. It's like the difference between a DVD and a VHS tape. With a DVD you can immediately jump to a scene whereas with a VHS tape you have to scan down the entire length of the tape until you get to the desired spot.
Another disadvantage compared to rsync is that each time you perform a backup, you have to copy every file again. This is not a problem for a one time backup like the one we are performing here but would be very time consuming if used as a routine procedure.
By the way, don't attempt a tar based backup on a VFAT (MS-DOS) formatted drive. VFAT has a maximum file size limit of 4GB and unless you have a very small set of home directories, you'll exceed the limit.
Here is our tar backup script:
#!/bin/bash
# usb_backup_ntfs - Backup system to external disk drive using tar
SOURCE="/etc /usr/local /home"
NTFS_DESTINATION=/media/BigDisk_NTFS/backup
if [[ -d $NTFS_DESTINATION ]]; then
for i in $SOURCE ; do
fn=${i//\/}
sudo tar -czv \
--exclude '/home/*/.gvfs' \
-f $NTFS_DESTINATION/$fn.tgz $i
done
fi
This script assumes a destination volume named BigDisk_NTFS containing a directory named backup. While we have implied that the volume is formatted as NTFS, this script will work on any Linux compatible file system that allows large files. The script creates one tar file for each of the source directories. It constructs the destination file names by removing the slashes from the source directory names and appending the extension ".tgz" to the end. Our invocation of tar includes the z option which applies gzip compression to the files contained within the archive. This slows things down a little, but saves some space on the backup device.
Other Details To Check
Since one of the goals of our new installation is to utilize new versions of our favorite apps starting with their native default configurations, we won't be restoring many of the configuration files from our existing system. This means that we need to manually record a variety of configuration settings. This information is good to have written down anyway. Record (or export to a file) the following:
Ready, Set, Go!
That about does it. Once our backups are made and our settings are recorded, the next thing to do is insert the install CD and reboot. I'll see you on the other side!
Further Reading
The following chapters in The Linux Command Line
Other installments in this series: 1 2 3 4 4a 5
Creating A Package List
In order to get a grip on the extra software I have installed on my desktop, I started out just writing a list of everything I saw in the desktop menus that did not appear on my 10.04 test systems. This is all the obvious stuff like Thunderbird, Gimp, Gthumb, etc., but what about the stuff that's not on the menu? I know I have installed many command line programs too. To get a complete list of the software installed on the system, we'll have to employ some command line magic:
me@twin7$ dpkg --list | awk '$1 == "ii" {print $2}' > ~/package_list.old.txt
This creates a list of all of the installed packages on the system and stores it in a file. We'll use this file to compare the package set with that of the new OS installation.
Making A Backup
The most important task we need to accomplish before we install the new OS is backing up the important data on the system for later restoration after the upgrade. For me, the files I need to preserve are located in /etc (the system's configuration files. I don't restore these, but keep them for reference), /usr/local (locally installed software and administration scripts), and /home (the files belonging to the users). If you are running a web server on your system, you will also probably need to backup portions of the /var directory as well.
There are many ways to perform backups. My systems normally backup every night to a local file server on my network, but for this exercise we'll use an external USB hard drive. We'll look at two popular methods: rsync and tar.
The choice of method depends on your needs and on how your external hard drive is formatted. The key feature afforded by both methods is that they preserve the attributes (permissions, ownerships, modification times, etc.) of the files being backed up. Another feature they both offer is the ability to exclude files from the backup because there are a few things that we don't want.
The rsync program copies files from one place to another. The source or destination may be a network drive, but for our purposes we will use a local (though external) volume. The great advantage of rsync is that once an initial copy is performed, subsequent updates can be made very rapidly as rsync only copies the changes made since the previous copy. The disadvantage of rsync is that the destination volume has to have a Unix-like file system since it relies on it to store the file attributes.
Here we have a script that will perform the backup using rsync. It assumes that we have an ext3 formatted file system on a volume named BigDisk and that the volume has a backup directory:
#!/bin/bash
# usb_backup - Backup system to external disk drive using rsync
SOURCE="/etc /usr/local /home"
EXT3_DESTINATION=/media/BigDisk/backup
if [[ -d $EXT3_DESTINATION ]]; then
sudo rsync -av \
--delete \
--exclude '/home/*/.gvfs' \
$SOURCE $EXT3_DESTINATION
fi
The script first checks that the destination directory exists and then performs rsync. The --delete option removes files on the destination that do not exist on the source. This way a perfect mirror of the source is maintained. We also exclude any .gvfs directories we encounter. They cause problems. This script can be used as a routine backup procedure. Once the initial backup is performed, later backups will be very fast since rsync identifies and copies only files that have changed between backups.
Our second approach uses the tar program. tar (short for tape archive) is a traditional Unix tool used for backups. While its original use was for writing files on magnetic tape, it can also write ordinary files. tar works by recording all of the source files into a single archive file called a tar file. Within the tar file all of the source file attributes are recorded along with the file contents. Since tar does not rely on the native file system of the backup device to store the source file attributes, it can use any Linux-supported file system to store the archive. This makes tar the logical choice if you are using an off-the-shelf USB hard drive formatted as NTFS. However, tar has a significant disadvantage compared to rsync. It is extremely cumbersome to restore single files from an archive if the archive is large.
Since tar writes its archives as though it were writing to magnetic tape, the archives are a sequential access medium. This means to find something in the archive, tar must read through the entire archive starting from the beginning to retrieve the information. This is opposed to a direct access medium such as a hard disk where the system can rapidly locate and retrieve a file directly. It's like the difference between a DVD and a VHS tape. With a DVD you can immediately jump to a scene whereas with a VHS tape you have to scan down the entire length of the tape until you get to the desired spot.
Another disadvantage compared to rsync is that each time you perform a backup, you have to copy every file again. This is not a problem for a one time backup like the one we are performing here but would be very time consuming if used as a routine procedure.
By the way, don't attempt a tar based backup on a VFAT (MS-DOS) formatted drive. VFAT has a maximum file size limit of 4GB and unless you have a very small set of home directories, you'll exceed the limit.
Here is our tar backup script:
#!/bin/bash
# usb_backup_ntfs - Backup system to external disk drive using tar
SOURCE="/etc /usr/local /home"
NTFS_DESTINATION=/media/BigDisk_NTFS/backup
if [[ -d $NTFS_DESTINATION ]]; then
for i in $SOURCE ; do
fn=${i//\/}
sudo tar -czv \
--exclude '/home/*/.gvfs' \
-f $NTFS_DESTINATION/$fn.tgz $i
done
fi
This script assumes a destination volume named BigDisk_NTFS containing a directory named backup. While we have implied that the volume is formatted as NTFS, this script will work on any Linux compatible file system that allows large files. The script creates one tar file for each of the source directories. It constructs the destination file names by removing the slashes from the source directory names and appending the extension ".tgz" to the end. Our invocation of tar includes the z option which applies gzip compression to the files contained within the archive. This slows things down a little, but saves some space on the backup device.
Other Details To Check
Since one of the goals of our new installation is to utilize new versions of our favorite apps starting with their native default configurations, we won't be restoring many of the configuration files from our existing system. This means that we need to manually record a variety of configuration settings. This information is good to have written down anyway. Record (or export to a file) the following:
- Email Configuration
- Bookmarks
- Address Books
- Passwords
- Names Of Firefox Extensions
- Others As Needed
Ready, Set, Go!
That about does it. Once our backups are made and our settings are recorded, the next thing to do is insert the install CD and reboot. I'll see you on the other side!
Further Reading
The following chapters in The Linux Command Line
- Chapter 16 - Storage Media (covers formatting external drives)
- Chapter 19 - Archiving And Backup (covers rsync, tar, gzip)
- rsync
- tar
Other installments in this series: 1 2 3 4 4a 5
Tuesday, March 23, 2010
Project: Getting Ready For Ubuntu 10.04 - Part 3
Now that Ubuntu 10.04 Beta 1 has been released, it's time to start our work. In this installment we will obtain a copy of Beta 1, make some installation media, install it, and begin our testing.
Getting The Beta 1 Image
This page has links to the ISO images that we will use. Of course, you could just download them from your web browser, but what's the fun in that? Since we are command line junkies here at LinuxCommand.org, we use the command line to download our images. You can do it like this:
me@linuxbox: ~$ wget url
where url is the web address of the ISO image we want to download In my case, I used this command to get the "PC (Intel x86) Desktop CD":
wget http://releases.ubuntu.com/10.04/ubuntu-10.04-beta1-desktop-i386.iso

Creating Installation Media
The next step is making the installation media. I always use re-writable media for this kind of work, so we have to first "blank" our CD, then write the image on it. To do this, we use the wodim program. First, we need to determine what our system calls the CD burner. We can do this with the following command:
me@linuxbox: ~$ wodim --devices
wodim will execute and print a list of the optical media drives it sees. The results will look like this:
wodim: Overview of accessible drives (1 found) :
-------------------------------------------------------------------------
0 dev='/dev/scd0' rwrw-- : 'Optiarc' 'DVD+-RW AD-7200S'
-------------------------------------------------------------------------
On my system, we see that the CD-ROM drive/burner is the device "/dev/scd0". Yours may be different.
insert the re-writable disk into the drive. If your system automatically mounts the disk, unmount it with a command such as this:
me@linuxbox: ~$ sudo umount /dev/scd0
Next, we blank the media with this command:
me@linuxbox: ~$ wodim -vv dev=/dev/scd0 blank=all
The blanking operation will take several minutes. After it completes, we can write the image with this command:
me@linuxbox: ~$ wodim -v dev=/dev/scd0 -data ubuntu-10.04-beta1-desktop-i386.iso
After the write is completed, we need to verify that the disk matches the ISO file. Using this command will do the trick:
me@linuxbox: ~$ md5sum ubuntu-10.04-beta1-desktop-i386.iso /dev/scd0
7ddbfbcfcc562bae2e160695ec820e39 ubuntu-10.04-beta1-desktop-i386.iso
7ddbfbcfcc562bae2e160695ec820e39 /dev/scd0
If the two checksums match, we have a good burn.
Installation
Depending on which variety of 10.04 you have downloaded (desktop, alternate, etc.), the installation procedure should be familiar to any Ubuntu user. The live desktop version differs from previous versions in that it no longer prompts you for running live or installing immediately after booting, rather you are forced to wait (and wait...) for the entire live CD to come up before being prompted with a graphical screen. Not an improvement, in my opinion.
After installation, the first thing we do is open a terminal and perform an update to the system using the following commands:
sudo apt-get update
sudo apt-get upgrade
Be aware that during the testing period, the Ubuntu team releases a steady stream of updates. It is not unusual for a hundred or more package updates to be released each day during periods of heavy development. I actually created this alias and put it in my .bashrc file on the test machine:
alias update='sudo apt-get update && sudo apt-get upgrade'
Now I just have to type "upgrade" to bring the machine up to date.
Paying For Your Software - Testing
This is a theme I have touched on before. If you have been an avid Linux consumer, you should consider becoming an avid Linux producer. Great software doesn't write itself. There are many ways you can help build the future of computing (and by the way, cheer leading is not one of them). One way is by performing good software testing. I have included some links (below) that document some of the tools and techniques that Ubuntu recommend for testing and bug reporting.
Meanwhile, Back At The Ranch...
Work continues on cleaning up the production systems in preparation for the upgrade. I also performed live CD tests on both systems to look for possible hardware incompatibilities. I haven't found any on the desktop system (yet) and the laptop has some minor video issues when booting. Work will continue.
Further Reading
10.04 Beta 1 Release Notes:
Some advice on CD/DVD burning:
Tips and techniques for software testers:
Getting The Beta 1 Image
This page has links to the ISO images that we will use. Of course, you could just download them from your web browser, but what's the fun in that? Since we are command line junkies here at LinuxCommand.org, we use the command line to download our images. You can do it like this:
me@linuxbox: ~$ wget url
where url is the web address of the ISO image we want to download In my case, I used this command to get the "PC (Intel x86) Desktop CD":
wget http://releases.ubuntu.com/10.04/ubuntu-10.04-beta1-desktop-i386.iso
Creating Installation Media
The next step is making the installation media. I always use re-writable media for this kind of work, so we have to first "blank" our CD, then write the image on it. To do this, we use the wodim program. First, we need to determine what our system calls the CD burner. We can do this with the following command:
me@linuxbox: ~$ wodim --devices
wodim will execute and print a list of the optical media drives it sees. The results will look like this:
wodim: Overview of accessible drives (1 found) :
-------------------------------------------------------------------------
0 dev='/dev/scd0' rwrw-- : 'Optiarc' 'DVD+-RW AD-7200S'
-------------------------------------------------------------------------
On my system, we see that the CD-ROM drive/burner is the device "/dev/scd0". Yours may be different.
insert the re-writable disk into the drive. If your system automatically mounts the disk, unmount it with a command such as this:
me@linuxbox: ~$ sudo umount /dev/scd0
Next, we blank the media with this command:
me@linuxbox: ~$ wodim -vv dev=/dev/scd0 blank=all
The blanking operation will take several minutes. After it completes, we can write the image with this command:
me@linuxbox: ~$ wodim -v dev=/dev/scd0 -data ubuntu-10.04-beta1-desktop-i386.iso
After the write is completed, we need to verify that the disk matches the ISO file. Using this command will do the trick:
me@linuxbox: ~$ md5sum ubuntu-10.04-beta1-desktop-i386.iso /dev/scd0
7ddbfbcfcc562bae2e160695ec820e39 ubuntu-10.04-beta1-desktop-i386.iso
7ddbfbcfcc562bae2e160695ec820e39 /dev/scd0
If the two checksums match, we have a good burn.
Installation
Depending on which variety of 10.04 you have downloaded (desktop, alternate, etc.), the installation procedure should be familiar to any Ubuntu user. The live desktop version differs from previous versions in that it no longer prompts you for running live or installing immediately after booting, rather you are forced to wait (and wait...) for the entire live CD to come up before being prompted with a graphical screen. Not an improvement, in my opinion.
After installation, the first thing we do is open a terminal and perform an update to the system using the following commands:
sudo apt-get update
sudo apt-get upgrade
Be aware that during the testing period, the Ubuntu team releases a steady stream of updates. It is not unusual for a hundred or more package updates to be released each day during periods of heavy development. I actually created this alias and put it in my .bashrc file on the test machine:
alias update='sudo apt-get update && sudo apt-get upgrade'
Now I just have to type "upgrade" to bring the machine up to date.
Paying For Your Software - Testing
This is a theme I have touched on before. If you have been an avid Linux consumer, you should consider becoming an avid Linux producer. Great software doesn't write itself. There are many ways you can help build the future of computing (and by the way, cheer leading is not one of them). One way is by performing good software testing. I have included some links (below) that document some of the tools and techniques that Ubuntu recommend for testing and bug reporting.
Meanwhile, Back At The Ranch...
Work continues on cleaning up the production systems in preparation for the upgrade. I also performed live CD tests on both systems to look for possible hardware incompatibilities. I haven't found any on the desktop system (yet) and the laptop has some minor video issues when booting. Work will continue.
Further Reading
10.04 Beta 1 Release Notes:
Some advice on CD/DVD burning:
- https://help.ubuntu.com/community/BurningIsoHowto
- https://help.ubuntu.com/community/CdDvd/Burning
- Chapter 16 of The Linux Command Line covers various kinds of storage media.
Tips and techniques for software testers:
- https://wiki.ubuntu.com/Testing
- https://help.ubuntu.com/community/ReportingBugs
- https://wiki.ubuntu.com/DebuggingProcedures
Thursday, March 18, 2010
Project: Building An All-Text Linux Workstation - Part 14
In this, our final installment, we will look at the screen terminal multiplexing program. What the heck is a "terminal multiplexing program?" I'm glad you asked.
Now that we have installed a bunch of interactive applications on our workstations and SSH to allow remote access, we have a slight problem. Is it reasonable for an interactive program (like mutt) monopolize our terminal session? Isn't Linux multi-tasking? On the graphical desktop, we can have many applications running at once and, by moving the mouse, we can switch from application to application. Of course, on the console, we can switch virtual terminals to provide multiple sessions and if we are using SSH, remotely accessing our workstation from a graphical desktop, we can open multiple terminal windows.
But there's another way. The screen program allows multiple sessions inside a single terminal. You can create any number of sessions and can even split screens to view two sessions at once. Further (and this is the cool part), screen allows you to "detach" a session from a terminal and later re-attach the session to a different terminal.
Installing And Running screen
By this time, we all know the drill:
me@linuxbox:~$ sudo apt-get install screen
will install the screen package. To run screen, we type screen at the prompt followed optionally by the name of a program we want to execute in the screen session. If no program is specified, screen launches a shell. Try this:
me@linuxbox:~$ screen top
After you run this command, top will execute and everything will appear normal. However screen is now managing the terminal session. screen recognizes a large number of commands. You communicate with screen by pressing Ctrl-a followed by a command letter. For example, to create another session type Ctrl-a c and a new shell prompt will appear. There are now two sessions running in the same terminal. We can cycle through the sessions by repeatedly typing Ctrl-a n (for next).
Listing Your Sessions
The Ctrl-a " command displays a list of your screen sessions:
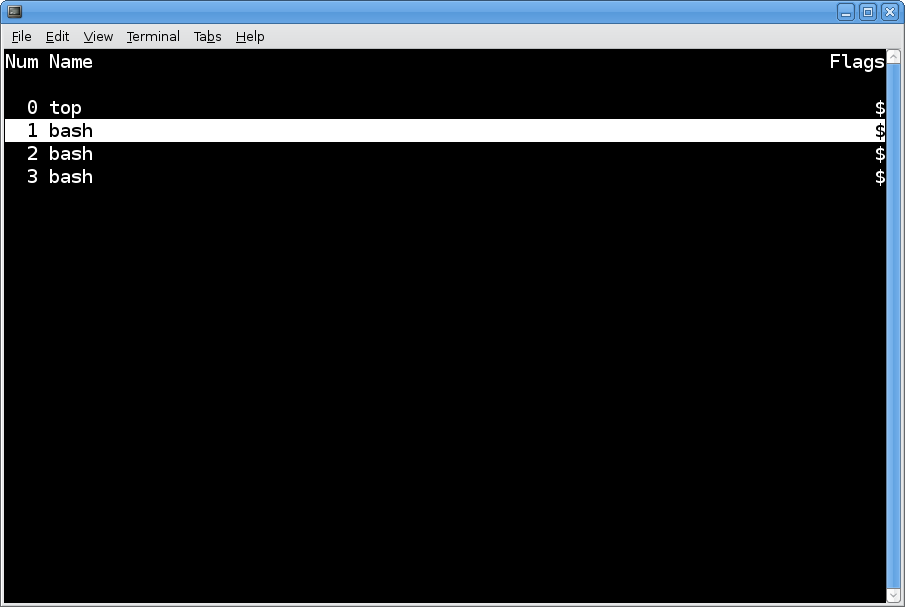
From here you can use your up and down arrow keys to select a session to display.
Scrolling And Copying
If you are using screen on a terminal session displayed in a graphical terminal, you will notice that the normal scrolling mechanism no longer works. This makes sense because if it did, your graphical terminal's scroll back buffer would contain the jumbled contents of all of the screen terminal sessions. screen manages its own scroll back buffers, one for each screen session. To access the scroll back buffer (which is called "copy mode" in the screen documentation), type: Ctrl-a [ and you will be able to use up arrow, PgUp, etc to navigate the buffer. In this mode (which uses many of the vi keyboard sequences) you can copy text for later pasting. You do this by marking text. To mark text, you position the cursor at the beginning of the text you want to copy and press the space bar, then move the cursor to the end of the text you want to copy and press the space bar again. The marked region is copied into a paste buffer and screen exits copy mode. To paste the copied text, type the screen command: Ctrl-a ]
Detaching And Reattaching Sessions
By far, the coolest feature of screen is its ability to detach and reattach terminal sessions. Picture this scenario: you're at work and you have just started a long running job on your work computer in a terminal. With screen, you can detach the session, log off, go home, reconnect with the your work computer, then reattach the still-running job to your new terminal session.
Here is a demonstration (assuming we have another computer besides our workstation, if not, you can use two virtual terminals on the workstation):
We've only touched on the capabilities of screen. It has many commands and a configuration file that can be used to adjust many of its features. See the links below for more detail.
In Conclusion
I hope you have enjoyed this series and that you continue to learn about the applications and techniques that we have covered. While we created a workstation that did not have a windowing system, the programs we installed work just fine on graphical workstations too. The text-based capabilities of Linux should never be overlooked. Text-based applications are almost always faster and much less resource-intensive than their graphical counterparts, so they make great additions to you solutions toolbox.
Further Reading
The official GNU screen site and documentation:
A screen tutorial from the Debian project:
A quick reference guide to screen (this site also contains a lot of other well-written screen documentation):
Other installments in this series: 1 2 3 4 5 6 7 8 9 10 11 12 13 14
Now that we have installed a bunch of interactive applications on our workstations and SSH to allow remote access, we have a slight problem. Is it reasonable for an interactive program (like mutt) monopolize our terminal session? Isn't Linux multi-tasking? On the graphical desktop, we can have many applications running at once and, by moving the mouse, we can switch from application to application. Of course, on the console, we can switch virtual terminals to provide multiple sessions and if we are using SSH, remotely accessing our workstation from a graphical desktop, we can open multiple terminal windows.
But there's another way. The screen program allows multiple sessions inside a single terminal. You can create any number of sessions and can even split screens to view two sessions at once. Further (and this is the cool part), screen allows you to "detach" a session from a terminal and later re-attach the session to a different terminal.
Installing And Running screen
By this time, we all know the drill:
me@linuxbox:~$ sudo apt-get install screen
will install the screen package. To run screen, we type screen at the prompt followed optionally by the name of a program we want to execute in the screen session. If no program is specified, screen launches a shell. Try this:
me@linuxbox:~$ screen top
After you run this command, top will execute and everything will appear normal. However screen is now managing the terminal session. screen recognizes a large number of commands. You communicate with screen by pressing Ctrl-a followed by a command letter. For example, to create another session type Ctrl-a c and a new shell prompt will appear. There are now two sessions running in the same terminal. We can cycle through the sessions by repeatedly typing Ctrl-a n (for next).
Listing Your Sessions
The Ctrl-a " command displays a list of your screen sessions:
Scrolling And Copying
If you are using screen on a terminal session displayed in a graphical terminal, you will notice that the normal scrolling mechanism no longer works. This makes sense because if it did, your graphical terminal's scroll back buffer would contain the jumbled contents of all of the screen terminal sessions. screen manages its own scroll back buffers, one for each screen session. To access the scroll back buffer (which is called "copy mode" in the screen documentation), type: Ctrl-a [ and you will be able to use up arrow, PgUp, etc to navigate the buffer. In this mode (which uses many of the vi keyboard sequences) you can copy text for later pasting. You do this by marking text. To mark text, you position the cursor at the beginning of the text you want to copy and press the space bar, then move the cursor to the end of the text you want to copy and press the space bar again. The marked region is copied into a paste buffer and screen exits copy mode. To paste the copied text, type the screen command: Ctrl-a ]
Detaching And Reattaching Sessions
By far, the coolest feature of screen is its ability to detach and reattach terminal sessions. Picture this scenario: you're at work and you have just started a long running job on your work computer in a terminal. With screen, you can detach the session, log off, go home, reconnect with the your work computer, then reattach the still-running job to your new terminal session.
Here is a demonstration (assuming we have another computer besides our workstation, if not, you can use two virtual terminals on the workstation):
- Start screen on the workstation and create a few sessions and put applications in them. Try top, mutt, and irssi, for example.
- After the applications are running, move over to your second computer and log into the workstation using SSH.
- On the second computer, enter the command screen -D -R into the remote SSH session.
- Poof! All the screen sessions on the workstation are detached, you are logged off of the workstation console, and all of the sessions are reattached to the terminal running the SSH client on the second computer. Pretty slick!
We've only touched on the capabilities of screen. It has many commands and a configuration file that can be used to adjust many of its features. See the links below for more detail.
In Conclusion
I hope you have enjoyed this series and that you continue to learn about the applications and techniques that we have covered. While we created a workstation that did not have a windowing system, the programs we installed work just fine on graphical workstations too. The text-based capabilities of Linux should never be overlooked. Text-based applications are almost always faster and much less resource-intensive than their graphical counterparts, so they make great additions to you solutions toolbox.
Further Reading
The official GNU screen site and documentation:
A screen tutorial from the Debian project:
A quick reference guide to screen (this site also contains a lot of other well-written screen documentation):
Other installments in this series: 1 2 3 4 5 6 7 8 9 10 11 12 13 14
Tuesday, March 16, 2010
Project: Getting Ready For Ubuntu 10.04 - Part 2
Last time, we announced our intention to upgrade some of our systems to Ubuntu 10.04, so what's next? To paraphrase a sight gag from an early episode of South Park:

In this installment we are going to cover the planning phase of the upgrade process. Good planning is often the difference between a good upgrade experience experience and a bad one. As a computing environment becomes more complex, planning becomes more essential. My environment is fairly complex so I have to plan.
Objective
The first element to any good plan (and not just for OS upgrades) is a clear objective. That is, in the broadest terms, what do we hope to accomplish? In my case, I want to install Ubuntu 10.04 on two computers (my main desktop system and my laptop) currently running Ubuntu 8.04 while maintaining all of the application set (and capabilities), network integration, and user data.
Notice that I said install and not upgrade. I have learned through many years of experience that upgrades don't really work. They kind of work sometimes, but they never really work. Often, an OS upgrade is not able to apply every new feature in the new version. For example, converting an existing file system to a new file system type is often impossible. Also, I don't want to reuse my existing configuration and settings files. I want to reconfigure based on the new default configuration, again to take advantage of everything the new release has to offer.
I know (from scanning the forums) that a lot of people are content to just pop in an installation CD and push the upgrade button and hope for the best. Then those same people start crying because they get a black screen when they reboot, or their wireless stops working, or their sound is busted, etc., etc., etc.
System Survey
Since our objective states that we have to maintain the application set, network integration and user data, we better figure out what that is. We do that by performing an inventory of our existing system Here are some things to keep an eye on:
This is also a good time to do some system maintenance. Between cleanings, computers get a lot of application and data buildup. I have added many applications to my base system, some of which I use and others which I don't. It's good to make a list and decide what you really want on your "new" computer and what you can live without. The same goes for data. Do you really need all those video files? See if you can clear a few gigabytes off that disk. It will make things easier later.
Testing
We're going to get involved with Ubuntu 10.04 starting with the Beta 1 release scheduled for release on March 18. I have a test computer prepared where I will attempt to build approximations of the finished systems. In doing so, I will be able to see what, if anything, blocks my desired configuration. It also provides a chance to look at the new features in this release, as well as alternate applications. We will also use live CDs to test the hardware support on the real systems.
Installation
Once the final release of Ubuntu 10.04 occurs on or about April 29, we should be ready to install. We'll make our installation media, create and verify our final system backup, perform the installation, and restore any additional applications.
Configuration
The final phase of the project is adjusting the configuration of the new system to our liking. This will involve recreating accounts and application settings. We will also restore the user data from our backups.
After everything is restored and configured we will verify that everything is in order. The very last step is to re-enable the system backups and begin using the systems for production use.
Further Reading
Other installments in this series: 1 2 3 4 4a 5

In this installment we are going to cover the planning phase of the upgrade process. Good planning is often the difference between a good upgrade experience experience and a bad one. As a computing environment becomes more complex, planning becomes more essential. My environment is fairly complex so I have to plan.
Objective
The first element to any good plan (and not just for OS upgrades) is a clear objective. That is, in the broadest terms, what do we hope to accomplish? In my case, I want to install Ubuntu 10.04 on two computers (my main desktop system and my laptop) currently running Ubuntu 8.04 while maintaining all of the application set (and capabilities), network integration, and user data.
Notice that I said install and not upgrade. I have learned through many years of experience that upgrades don't really work. They kind of work sometimes, but they never really work. Often, an OS upgrade is not able to apply every new feature in the new version. For example, converting an existing file system to a new file system type is often impossible. Also, I don't want to reuse my existing configuration and settings files. I want to reconfigure based on the new default configuration, again to take advantage of everything the new release has to offer.
I know (from scanning the forums) that a lot of people are content to just pop in an installation CD and push the upgrade button and hope for the best. Then those same people start crying because they get a black screen when they reboot, or their wireless stops working, or their sound is busted, etc., etc., etc.
System Survey
Since our objective states that we have to maintain the application set, network integration and user data, we better figure out what that is. We do that by performing an inventory of our existing system Here are some things to keep an eye on:
- Required Applications. When performing your system survey, go through the application menus and list everything you rely on. In an upcoming installment we will write a script that will prepare a package list to compare against the new installation to ensure that we reinstall all the apps that we care about. If you use Firefox, pay special attention to bookmarks, stored passwords, and add-ons.
- Network Services. My workstations mount file systems on NFSv4 and Samba shares. I also use an LDAP database to manage my address book.
- Hardware Features. We will want to make sure that all of our hardware is working. During the testing phase we will cover video, sound, wired and wireless networking, CD/DVD reading and writing, printing, scanners/cameras, and USB devices
This is also a good time to do some system maintenance. Between cleanings, computers get a lot of application and data buildup. I have added many applications to my base system, some of which I use and others which I don't. It's good to make a list and decide what you really want on your "new" computer and what you can live without. The same goes for data. Do you really need all those video files? See if you can clear a few gigabytes off that disk. It will make things easier later.
Testing
We're going to get involved with Ubuntu 10.04 starting with the Beta 1 release scheduled for release on March 18. I have a test computer prepared where I will attempt to build approximations of the finished systems. In doing so, I will be able to see what, if anything, blocks my desired configuration. It also provides a chance to look at the new features in this release, as well as alternate applications. We will also use live CDs to test the hardware support on the real systems.
Installation
Once the final release of Ubuntu 10.04 occurs on or about April 29, we should be ready to install. We'll make our installation media, create and verify our final system backup, perform the installation, and restore any additional applications.
Configuration
The final phase of the project is adjusting the configuration of the new system to our liking. This will involve recreating accounts and application settings. We will also restore the user data from our backups.
After everything is restored and configured we will verify that everything is in order. The very last step is to re-enable the system backups and begin using the systems for production use.
Further Reading
Other installments in this series: 1 2 3 4 4a 5
Thursday, March 11, 2010
Project: Building An All-Text Linux Workstation - Part 13
Don't touch that dial! Even the most die hard GUI fans among you will enjoy this.
You may have noticed that throughout this series, I have posted screen shots of the applications used on our all-text Linux workstation; screen shots that obviously are taken from a graphical desktop, so what gives? Am I lying about this being an all-text workstation? Not at all. I do take the screen shots on a graphical desktop. How? By logging in to the workstation remotely from another computer.
One of the great joys of Unix-like operating systems (such as Linux) is the way they work with networks. Much of the Internet's technology was developed on Unix systems and it shows. Ever wonder why URLs use forward slashes? Unix pathnames!
Back in the early days of my Unix career (the mid-1990s), there was a idea going around (foisted by the marketing people at Microsoft) that the newly introduced Windows NT was going to rapidly "kill" Unix. Real Unix people knew this to be patent nonsense (though many of their pointy-haired bosses did not) because NT lacked an essential feature. It didn't support remote administration. I remember system admins complaining bitterly about how to fix even simple problems on NT, they had to travel to the machine and work the graphical interface personally. Meanwhile, my team and I were managing a national network consisting of hundreds of Unix workstations and servers from our little office. The only time we ever had to travel to a site was to replace hardware.
Over the years, there have been several Unix technologies used to perform remote administration. Today, the overwhelming favorite is SSH (Secure SHell). SSH allows the creation of a secure encrypted tunnel between machines through which can flow any number of network protocols. It's most common use however is simple command line access to a remote system.
It works like this: a local machine runs a SSH client program that talks to a remote machine running a SSH server. Every Linux system I have ever used comes equipped with a SSH client but most distributions do not install the server by default. This is unfortunate since almost every system can benefit from remote administration.
Installing The OpenSSH Server
The most popular SSH implementation in the Linux world comes from the OpenBSD project. It's called OpenSSH. It is usually broken into two packages: the openssh-client package and the openssh-server package. The client package is usually installed by default but we will need to install the server package on our workstation. We can do this with the following command:
me@linuxbox:~$ sudo apt-get install openssh-server
That's all there is to it. After the package installs, the service will start and our workstation can now be remotely accessed. To demonstrate, we will open a terminal window on another machine on our network and use the SSH client program (called ssh) to log into our workstation:
bshotts@twin2:~$ ssh me@linuxbox
The authenticity of host 'linuxbox (192.168.1.7)' can't be established.
RSA key fingerprint is bf:bb:0e:9b:af:a1:dd:e0:b6:44:48:79:97:2f:34:97.
Are you sure you want to continue connecting (yes/no)? yes
The ssh program is invoked with this syntax:
ssh [user@]hostname
where user is an optional user name and hostname is the network name (or IP address) of the machine we want to connect with. If the user name is omitted, ssh defaults to the name you are currently using on the local system.
The first time you connect with a remote system, ssh warns you that it has never seen this remote machine before. One of the security features of SSH is that it authenticates the remote systems you talk to. This ensures that the machine you are talking to really is the machine you think it is.
After answering "yes" to the prompt, ssh adds the remote system to its list of remote hosts that it will recognize in future sessions:
Warning: Permanently added 'linuxbox' (RSA) to the list of known hosts.
Finally, it prompts you for the user's password on the remote system.
me@linuxbox's password:
Once that is entered, you are logged in!
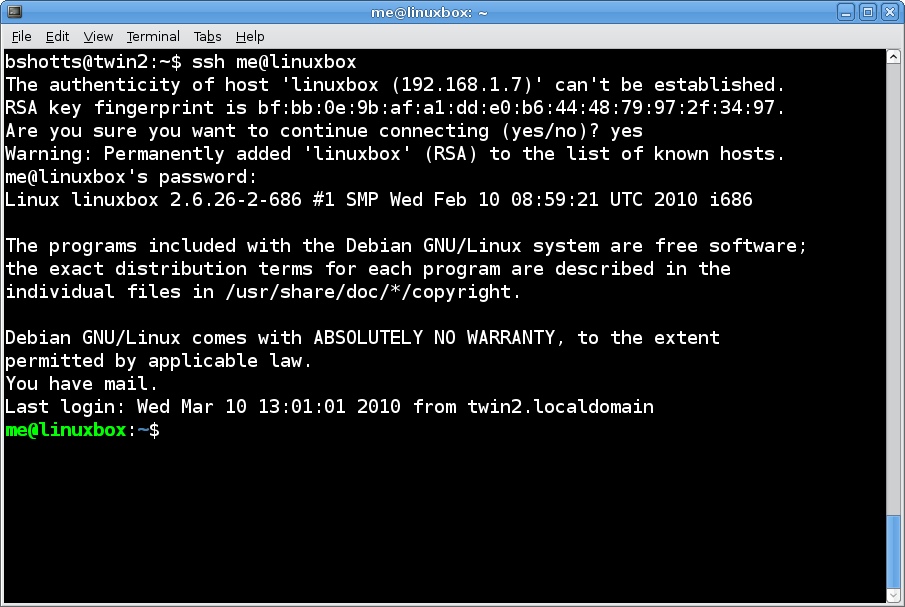
From here, you can use any of the applications on the workstation just as if you were sitting in front of the workstation's console.
To end a SSH session, use the exit command:
me@linuxbox"~$ exit
Connection to linuxbox closed.
bshotts@twin2:~$
Executing A Single Command On A Remote System
We can also use the ssh program to remotely execute a single command on our workstation. For example, we could ask our workstation about its uptime and load:
bshotts@twin2:~$ ssh me@linuxbox uptime
me@linuxbox's password:
13:58:39 up 2 min, 0 users, load average: 0.10, 0.14, 0.06
bshotts@twin2:~$
If a command follows the hostname, ssh will execute the command on the remote system and the command's output is transferred to the local machine for display.
Copying Files Using SSH
In addition to the ssh program, the openssh-client package also provides two additional programs used for securely copying files to and from remote systems. The first is scp (secure copy) which is used much like the regular cp command. To copy a file named somefile.txt to the home directory of user me on the workstation, we would do this.
bshotts@twin2:~$ scp somefile.txt me@linuxbox:
me@linuxbox's password:
somefile.txt 100% 10 0.0KB/s 00:00
To place the file in a specific directory (and/or rename the file) on the remote system, follow the hostname with the pathname of the desired destination:
bshotts@twin2:~$ scp somefile.txt me@linuxbox:/user/local/share/shared_file.txt
The second file copying program is sftp (secure ftp) which is a version of the ftp program that uses SSH for transport. Remember, the ordinary ftp program sends all of its data over the network unencrypted (including user names and passwords), making it unsuitable for use over the Internet.
Using The GUI With OpenSSH
The sftp protocol makes another feature possible. Most graphical file managers support it. From our graphical desktop we can move files to and from the remote workstation. Here's how:
In GNOME, we go to Places -> Connect to Server... and fill out the dialog as follows:
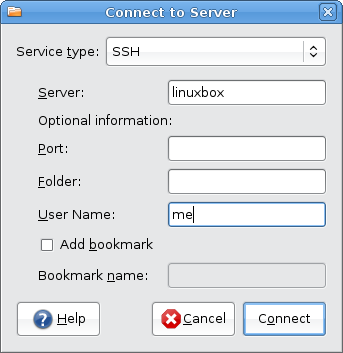
We will next be prompted for the password on the remote workstation:
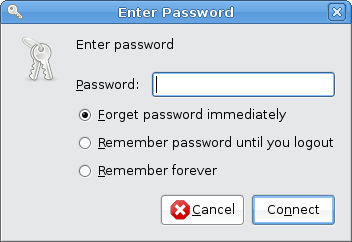
After that, voila! We're browsing the file system on the remote workstation:
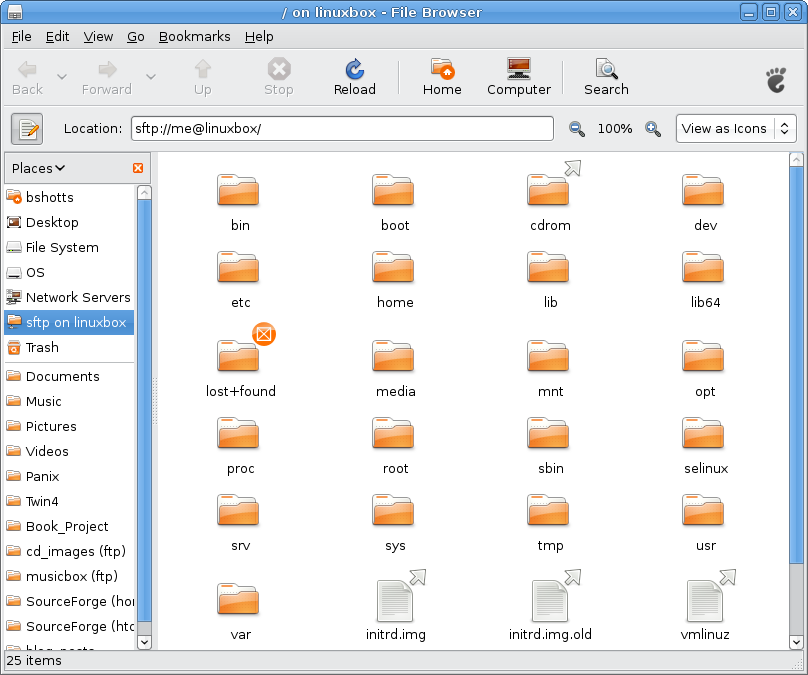
Adding Additional Users
With the ability to remotely connect to our workstation, it would make sense to add some user accounts. This way, more than one person can be using the workstation at the same time. To add a user account for an imaginary user named "user1", we would do this:
me@linuxbox:~$ su -
Password:
linuxbox:~# adduser user1
Adding user `user1' ...
Adding new group `user1' (1001) ...
Adding new user `user1' (1001) with group `user1' ...
Creating home directory `/home/user1' ...
Copying files from `/etc/skel' ...
Enter new UNIX password:
Retype new UNIX password:
passwd: password updated successfully
Changing the user information for user1
Enter the new value, or press ENTER for the default
Full Name []: Workstation User 1
Room Number []:
Work Phone []:
Home Phone []:
Other []:
Is the information correct? [Y/n] Y
linuxbox:~# exit
logout
me@linuxbox:~$
Now user1 can log in to the workstation with the command:
ssh user1@linuxbox
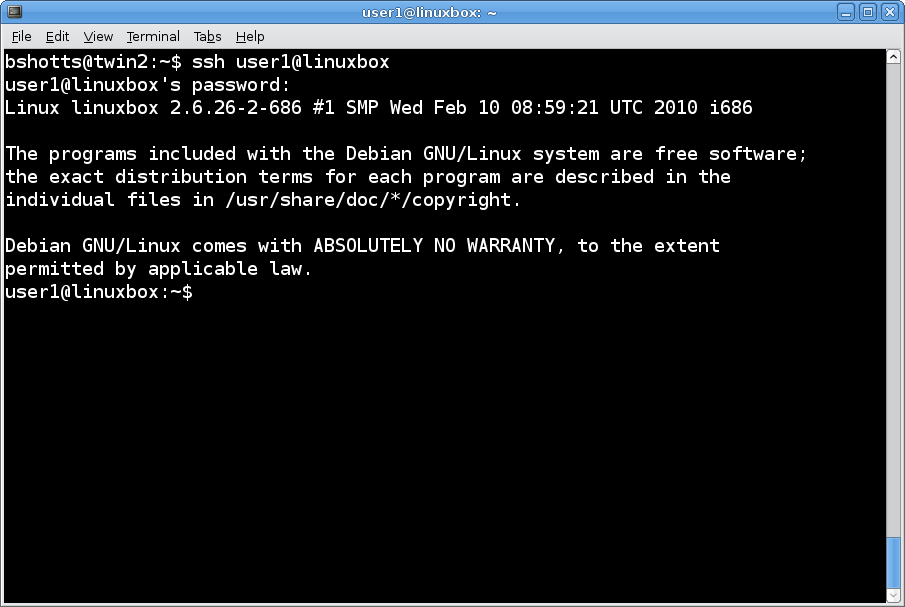
Deleting A User Account
This command will remove the above user account, if desired:
deluser --remove-home user1
Invite Your Friends!
Next time you have your Linux buddies over with their laptops, surprise them with individual user accounts on your awesomely configured all-text workstation. You'll be the hit of the party!
Further Reading
The man pages for ssh, scp, sftp
SSH is covered in The Linux Command Line (Chapter 17):
OpenSSH:
Windows users need not feel left out. PuTTY is a popular SSH client for Windows:
Other installments in this series: 1 2 3 4 5 6 7 8 9 10 11 12 13 14
You may have noticed that throughout this series, I have posted screen shots of the applications used on our all-text Linux workstation; screen shots that obviously are taken from a graphical desktop, so what gives? Am I lying about this being an all-text workstation? Not at all. I do take the screen shots on a graphical desktop. How? By logging in to the workstation remotely from another computer.
One of the great joys of Unix-like operating systems (such as Linux) is the way they work with networks. Much of the Internet's technology was developed on Unix systems and it shows. Ever wonder why URLs use forward slashes? Unix pathnames!
Back in the early days of my Unix career (the mid-1990s), there was a idea going around (foisted by the marketing people at Microsoft) that the newly introduced Windows NT was going to rapidly "kill" Unix. Real Unix people knew this to be patent nonsense (though many of their pointy-haired bosses did not) because NT lacked an essential feature. It didn't support remote administration. I remember system admins complaining bitterly about how to fix even simple problems on NT, they had to travel to the machine and work the graphical interface personally. Meanwhile, my team and I were managing a national network consisting of hundreds of Unix workstations and servers from our little office. The only time we ever had to travel to a site was to replace hardware.
Over the years, there have been several Unix technologies used to perform remote administration. Today, the overwhelming favorite is SSH (Secure SHell). SSH allows the creation of a secure encrypted tunnel between machines through which can flow any number of network protocols. It's most common use however is simple command line access to a remote system.
It works like this: a local machine runs a SSH client program that talks to a remote machine running a SSH server. Every Linux system I have ever used comes equipped with a SSH client but most distributions do not install the server by default. This is unfortunate since almost every system can benefit from remote administration.
Installing The OpenSSH Server
The most popular SSH implementation in the Linux world comes from the OpenBSD project. It's called OpenSSH. It is usually broken into two packages: the openssh-client package and the openssh-server package. The client package is usually installed by default but we will need to install the server package on our workstation. We can do this with the following command:
me@linuxbox:~$ sudo apt-get install openssh-server
That's all there is to it. After the package installs, the service will start and our workstation can now be remotely accessed. To demonstrate, we will open a terminal window on another machine on our network and use the SSH client program (called ssh) to log into our workstation:
bshotts@twin2:~$ ssh me@linuxbox
The authenticity of host 'linuxbox (192.168.1.7)' can't be established.
RSA key fingerprint is bf:bb:0e:9b:af:a1:dd:e0:b6:44:48:79:97:2f:34:97.
Are you sure you want to continue connecting (yes/no)? yes
The ssh program is invoked with this syntax:
ssh [user@]hostname
where user is an optional user name and hostname is the network name (or IP address) of the machine we want to connect with. If the user name is omitted, ssh defaults to the name you are currently using on the local system.
The first time you connect with a remote system, ssh warns you that it has never seen this remote machine before. One of the security features of SSH is that it authenticates the remote systems you talk to. This ensures that the machine you are talking to really is the machine you think it is.
After answering "yes" to the prompt, ssh adds the remote system to its list of remote hosts that it will recognize in future sessions:
Warning: Permanently added 'linuxbox' (RSA) to the list of known hosts.
Finally, it prompts you for the user's password on the remote system.
me@linuxbox's password:
Once that is entered, you are logged in!
From here, you can use any of the applications on the workstation just as if you were sitting in front of the workstation's console.
To end a SSH session, use the exit command:
me@linuxbox"~$ exit
Connection to linuxbox closed.
bshotts@twin2:~$
Executing A Single Command On A Remote System
We can also use the ssh program to remotely execute a single command on our workstation. For example, we could ask our workstation about its uptime and load:
bshotts@twin2:~$ ssh me@linuxbox uptime
me@linuxbox's password:
13:58:39 up 2 min, 0 users, load average: 0.10, 0.14, 0.06
bshotts@twin2:~$
If a command follows the hostname, ssh will execute the command on the remote system and the command's output is transferred to the local machine for display.
Copying Files Using SSH
In addition to the ssh program, the openssh-client package also provides two additional programs used for securely copying files to and from remote systems. The first is scp (secure copy) which is used much like the regular cp command. To copy a file named somefile.txt to the home directory of user me on the workstation, we would do this.
bshotts@twin2:~$ scp somefile.txt me@linuxbox:
me@linuxbox's password:
somefile.txt 100% 10 0.0KB/s 00:00
To place the file in a specific directory (and/or rename the file) on the remote system, follow the hostname with the pathname of the desired destination:
bshotts@twin2:~$ scp somefile.txt me@linuxbox:/user/local/share/shared_file.txt
The second file copying program is sftp (secure ftp) which is a version of the ftp program that uses SSH for transport. Remember, the ordinary ftp program sends all of its data over the network unencrypted (including user names and passwords), making it unsuitable for use over the Internet.
Using The GUI With OpenSSH
The sftp protocol makes another feature possible. Most graphical file managers support it. From our graphical desktop we can move files to and from the remote workstation. Here's how:
In GNOME, we go to Places -> Connect to Server... and fill out the dialog as follows:
We will next be prompted for the password on the remote workstation:
After that, voila! We're browsing the file system on the remote workstation:
Adding Additional Users
With the ability to remotely connect to our workstation, it would make sense to add some user accounts. This way, more than one person can be using the workstation at the same time. To add a user account for an imaginary user named "user1", we would do this:
me@linuxbox:~$ su -
Password:
linuxbox:~# adduser user1
Adding user `user1' ...
Adding new group `user1' (1001) ...
Adding new user `user1' (1001) with group `user1' ...
Creating home directory `/home/user1' ...
Copying files from `/etc/skel' ...
Enter new UNIX password:
Retype new UNIX password:
passwd: password updated successfully
Changing the user information for user1
Enter the new value, or press ENTER for the default
Full Name []: Workstation User 1
Room Number []:
Work Phone []:
Home Phone []:
Other []:
Is the information correct? [Y/n] Y
linuxbox:~# exit
logout
me@linuxbox:~$
Now user1 can log in to the workstation with the command:
ssh user1@linuxbox
Deleting A User Account
This command will remove the above user account, if desired:
deluser --remove-home user1
Invite Your Friends!
Next time you have your Linux buddies over with their laptops, surprise them with individual user accounts on your awesomely configured all-text workstation. You'll be the hit of the party!
Further Reading
The man pages for ssh, scp, sftp
SSH is covered in The Linux Command Line (Chapter 17):
OpenSSH:
Windows users need not feel left out. PuTTY is a popular SSH client for Windows:
Other installments in this series: 1 2 3 4 5 6 7 8 9 10 11 12 13 14
Tuesday, March 9, 2010
Project: Getting Ready For Ubuntu 10.04 - Part 1
As you have probably heard, the next release of Ubuntu, 10.04 ("Lucid Lynx") will occur during the final days of April 2010. My production systems (the ones on which I do my writing and photography) are running Ubuntu 8.04 and I have decided to upgrade them to the upcoming version. This is the first of five-part series that will document my transition to the new version.
The 10.04 version, like the earlier 8.04 and 6.06 releases, is a so-called LTS or Long Term Support version of Ubuntu. This means that it receives security and bug fixes (but not application version upgrades) for a period of three years. This differs from the usual eighteen month support period for ordinary Ubuntu releases. I have used the LTS versions for several years and feel that it is the best choice for my production systems. I use a lot of Linux distros in my work, but for the machines I must rely on, I choose stability over the latest features. For example, my server systems are running CentOS 4 which first appeared in early 2005 and is still supported by Red Hat and the CentOS team. In fact, the main reason I switched from Red Hat (Fedora) to Ubuntu for my desktop systems was the availability of the Long Term Support versions, a feature that Fedora does not offer.
The Opportunity
In a past life, I ran the QA department of a software company and I often employ these skills to perform software testing on new Linux releases. This case will be no different. The first beta release of 10.04 is scheduled for March 18 so we will begin our work then. Testing is not just something I do for fun (it isn't) but it's important to look for problems that might interfere with the deployment. By checking for problems now, we have a better chance of getting them fixed before the final release.
The Mission
Our mission is to upgrade the production systems while preserving the existing data and functionality of the current systems. We'll also look for exciting new features and applications that will enhance their productive capacity. We will probably do a little scripting and system administration along the way, too :-)
The Players
The two production systems involved are my Dell Inspiron 530N (which originally shipped with Ubuntu 8.04 factory installed) and my IBM ThinkPad T41 laptop. We'll also use my main test computer, a Dell Dimension 2400N which is currently hosting our All-Text Linux Workstation. We might also take a look at the 10.04 Netbook Remix version to see if it offers any compelling reasons for upgrading my two netbooks, which are now running 9.04 UNR.
Stay tuned. This ought to be fun.
Further Reading
Other installments in this series: 1 2 3 4 4a 5
The 10.04 version, like the earlier 8.04 and 6.06 releases, is a so-called LTS or Long Term Support version of Ubuntu. This means that it receives security and bug fixes (but not application version upgrades) for a period of three years. This differs from the usual eighteen month support period for ordinary Ubuntu releases. I have used the LTS versions for several years and feel that it is the best choice for my production systems. I use a lot of Linux distros in my work, but for the machines I must rely on, I choose stability over the latest features. For example, my server systems are running CentOS 4 which first appeared in early 2005 and is still supported by Red Hat and the CentOS team. In fact, the main reason I switched from Red Hat (Fedora) to Ubuntu for my desktop systems was the availability of the Long Term Support versions, a feature that Fedora does not offer.
The Opportunity
In a past life, I ran the QA department of a software company and I often employ these skills to perform software testing on new Linux releases. This case will be no different. The first beta release of 10.04 is scheduled for March 18 so we will begin our work then. Testing is not just something I do for fun (it isn't) but it's important to look for problems that might interfere with the deployment. By checking for problems now, we have a better chance of getting them fixed before the final release.
The Mission
Our mission is to upgrade the production systems while preserving the existing data and functionality of the current systems. We'll also look for exciting new features and applications that will enhance their productive capacity. We will probably do a little scripting and system administration along the way, too :-)
The Players
The two production systems involved are my Dell Inspiron 530N (which originally shipped with Ubuntu 8.04 factory installed) and my IBM ThinkPad T41 laptop. We'll also use my main test computer, a Dell Dimension 2400N which is currently hosting our All-Text Linux Workstation. We might also take a look at the 10.04 Netbook Remix version to see if it offers any compelling reasons for upgrading my two netbooks, which are now running 9.04 UNR.
Stay tuned. This ought to be fun.
Further Reading
Other installments in this series: 1 2 3 4 4a 5
Wednesday, March 3, 2010
Project: Building An All-Text Linux Workstation - Part 12
In this installment, we're going to take a another look at messaging, this time focusing on Internet Relay Chat (IRC).
IRC is a popular text-mode application that finds wide use on a number of platforms. Of most interest to us, is its use as a tech support tool. IRC works by allowing a client program talk to a server that is part of an IRC network. Multiple users connect to the server and organize conversational groups called channels. Channels are topic-oriented and cater to a wide variety of interests. The participants of a channel then can converse with one another via a scrolling text display.
The centerim program we recently installed supports IRC in addition to a number of other popular messaging protocols, however, in this installment we will install a dedicated IRC client called irssi. To install irssi, we simply:
me@linuxbox:~$ sudo apt-get install irssi
To run irssi, we enter the command:
me@linuxbox:~$ irssi
and the initial screen will appear:
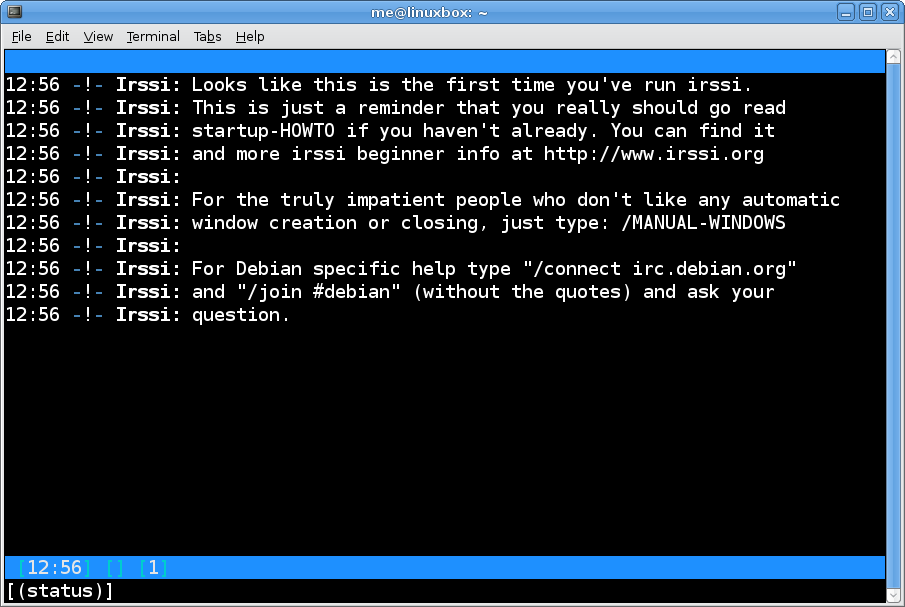
The first window displayed by irssi is called the status window. It is used to display information about server connections and other status messages. The initial message in the status message is useful as it points us to the program documentation and some specific connection instructions to join the Debian channel at Debian's own IRC server.
As you type, your input is displayed at the bottom of the screen. Entries starting with a slash character are interpreted as IRC commands and everything else as a message to post. To connect to the Debian server we type the following command:
/connect irc.debian.org
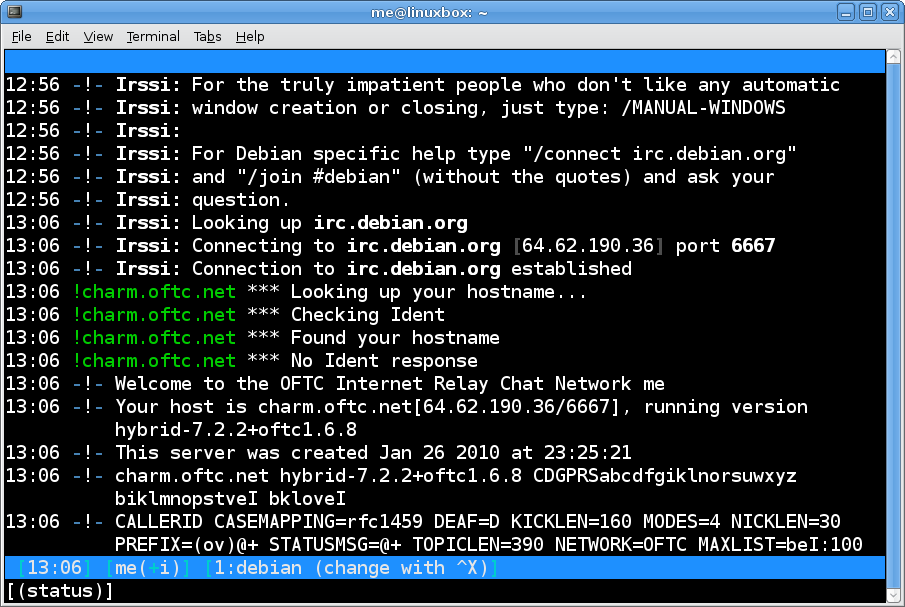
It will take a few seconds to connect.
By default, irssi will use your system user name as your "nick" or nickname during an IRC session. It's possible that your user name will conflict with an existing name already registered by a user of that server. In that case, we will get something like this:
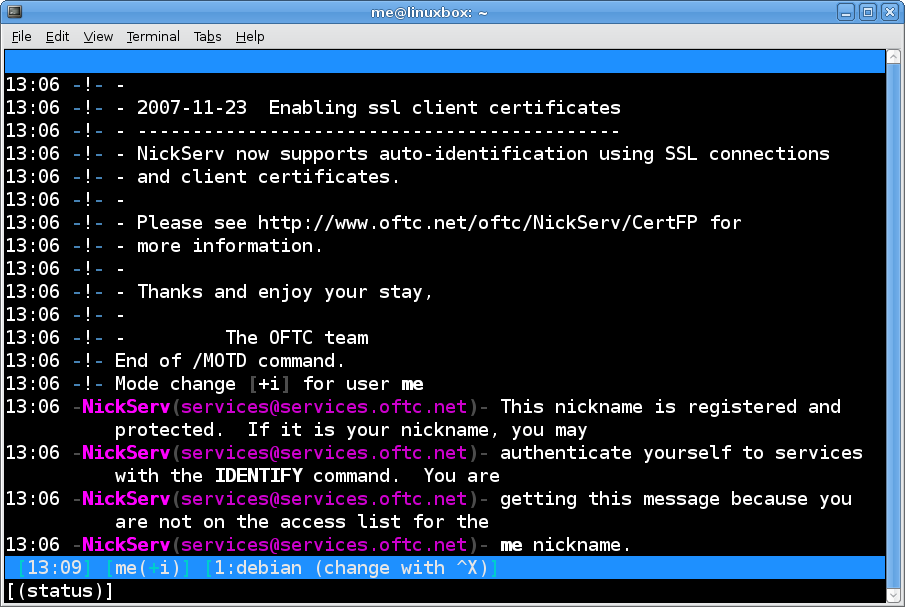
To overcome this problem, we need to choose another nickname. That is is done by entering this command:
/nick new_nickname
where new_nickname is the name you wish to use. In the examples that follow, we will use the nickname "linuxbox", but you should make up your own. We enter:
/nick linuxbox
and if we're successful, the status window will respond:
You're now known as linuxbox
Now that we have a connection to the IRC server, we next need to join a channel. Channel names start with a the # symbol. We can join the #debian channel by entering this command:
/join #debian
Next, we will see a list of all the members of the channel scroll by in another window which overlays the status window.
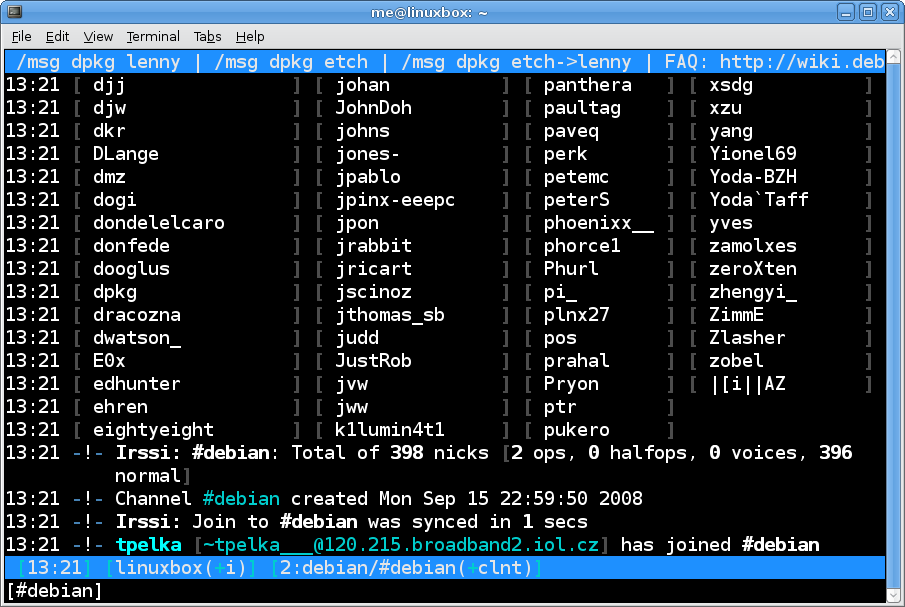
The prompt at the bottom of the screen changes to indicate that we are in a different window. Within a window, we can use the PgUp and PgDn keys to scroll the window's contents and we can use the Ctrl-p (previous) and Ctrl-n (next) keys to cycle through the available windows.
As we observe the #debian window, it will slowly scroll as members post questions and answers. If you are not familiar with IRC, you should consult a good tutorial and observe the general practices of the group before jumping in. Most channels also post links to official guidelines for the channel's use. You can see the guidelines for the #debian channel here.
To end our session, we enter this command:
/quit
Filtering Output
The default configuration of irssi displays a lot of non-message text in channel windows announcing the comings and goings of members:
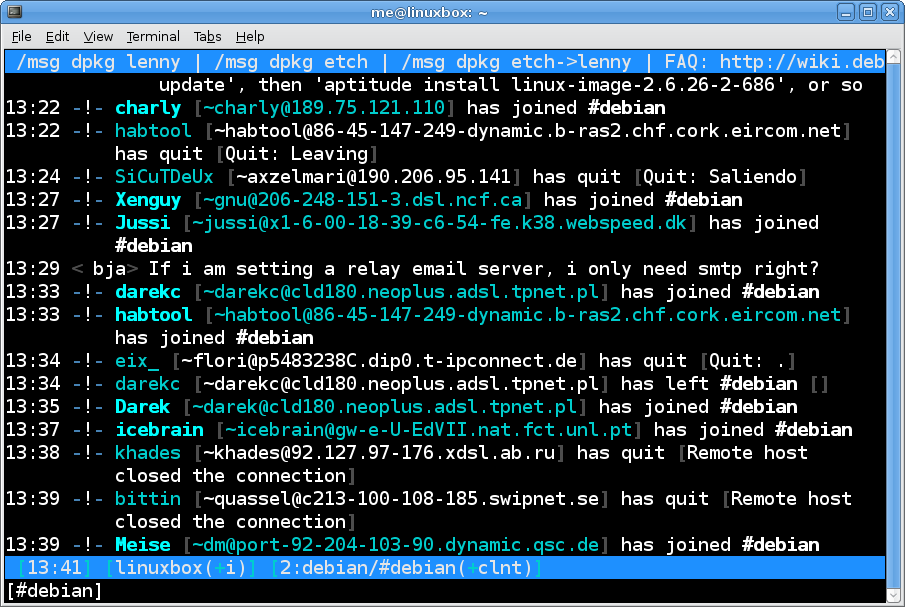
To filter this out of a channel, you can use a command like this:
/ignore -channels #debian * JOINS PARTS QUITS NICKS
Saving Your Settings
As you go through the irssi documention, you will see that irssi has a lot of features and capabilities. After you have changed your settings, such as adding the filter above, you can store your changes by entering the command:
/save
and your changes will be added to the ~/.irssi/config file.
Another Server To Try
Many Linux and FOSS projects have official support channels on Freenode. You can reach the Freenode server at irc.freenode.net. Try the #ubuntu, #fedora, etc. channels there.
Further Reading
IRC tutorials:
General IRC background:
Freenode:
irssi documentation:
IRC is a popular text-mode application that finds wide use on a number of platforms. Of most interest to us, is its use as a tech support tool. IRC works by allowing a client program talk to a server that is part of an IRC network. Multiple users connect to the server and organize conversational groups called channels. Channels are topic-oriented and cater to a wide variety of interests. The participants of a channel then can converse with one another via a scrolling text display.
The centerim program we recently installed supports IRC in addition to a number of other popular messaging protocols, however, in this installment we will install a dedicated IRC client called irssi. To install irssi, we simply:
me@linuxbox:~$ sudo apt-get install irssi
To run irssi, we enter the command:
me@linuxbox:~$ irssi
and the initial screen will appear:
The first window displayed by irssi is called the status window. It is used to display information about server connections and other status messages. The initial message in the status message is useful as it points us to the program documentation and some specific connection instructions to join the Debian channel at Debian's own IRC server.
As you type, your input is displayed at the bottom of the screen. Entries starting with a slash character are interpreted as IRC commands and everything else as a message to post. To connect to the Debian server we type the following command:
/connect irc.debian.org
It will take a few seconds to connect.
By default, irssi will use your system user name as your "nick" or nickname during an IRC session. It's possible that your user name will conflict with an existing name already registered by a user of that server. In that case, we will get something like this:
To overcome this problem, we need to choose another nickname. That is is done by entering this command:
/nick new_nickname
where new_nickname is the name you wish to use. In the examples that follow, we will use the nickname "linuxbox", but you should make up your own. We enter:
/nick linuxbox
and if we're successful, the status window will respond:
You're now known as linuxbox
Now that we have a connection to the IRC server, we next need to join a channel. Channel names start with a the # symbol. We can join the #debian channel by entering this command:
/join #debian
Next, we will see a list of all the members of the channel scroll by in another window which overlays the status window.
The prompt at the bottom of the screen changes to indicate that we are in a different window. Within a window, we can use the PgUp and PgDn keys to scroll the window's contents and we can use the Ctrl-p (previous) and Ctrl-n (next) keys to cycle through the available windows.
As we observe the #debian window, it will slowly scroll as members post questions and answers. If you are not familiar with IRC, you should consult a good tutorial and observe the general practices of the group before jumping in. Most channels also post links to official guidelines for the channel's use. You can see the guidelines for the #debian channel here.
To end our session, we enter this command:
/quit
Filtering Output
The default configuration of irssi displays a lot of non-message text in channel windows announcing the comings and goings of members:
To filter this out of a channel, you can use a command like this:
/ignore -channels #debian * JOINS PARTS QUITS NICKS
Saving Your Settings
As you go through the irssi documention, you will see that irssi has a lot of features and capabilities. After you have changed your settings, such as adding the filter above, you can store your changes by entering the command:
/save
and your changes will be added to the ~/.irssi/config file.
Another Server To Try
Many Linux and FOSS projects have official support channels on Freenode. You can reach the Freenode server at irc.freenode.net. Try the #ubuntu, #fedora, etc. channels there.
Further Reading
IRC tutorials:
- http://irchelp.org/irchelp/irctutorial.html
- http://en.wikipedia.org/wiki/Wikipedia:IRC/Tutorial
- http://wiki.debian.org/DebianIRCChannelGuidelines
General IRC background:
- http://en.wikipedia.org/wiki/Internet_Relay_Chat
- http://en.wikipedia.org/wiki/List_of_Internet_Relay_Chat_commands
Freenode:
irssi documentation:
- http://www.irssi.org/documentation/startup
- http://www.irssi.org/documentation/tips
- http://www.irssi.org/documentation
Wednesday, February 24, 2010
Project: Building An All-Text Linux Workstation - Part 11
Now that we have email working on our system, it's time to consider other types of communication tools, in particular, messaging. Text messaging is a very common form of communication today, often surpassing email as way of sending short bursts of small messages. Messaging actually has its roots in early Unix with the development of the write and talk programs in the late 1970s While both talk and write were used to communicate with multiple users sharing a single machine, messaging today generally involves users scattered all over the globe using the Internet.
There are many popular messaging protocols such as AIM (AOL Instant Messenger), Jabber, MSN, IRC, and others and many client programs that support one or more of these protocols. Many Linux users are familiar with Pidgin, a graphical, multi-protocol, messaging client.
In this installment, we will install a text-based analog to Pidgin called centerim, a fork of an earlier messaging client program called centericq.
On our Debian workstation, we can easily install centerim this way:
me@linuxbox:~$ sudo apt-get install centerim
After the program is installed, we can invoke it like so:
me@linuxbox:~$ centerim
The first time centerim runs, it displays a two-part configuration screen which is used to configure accounts and other stuff:
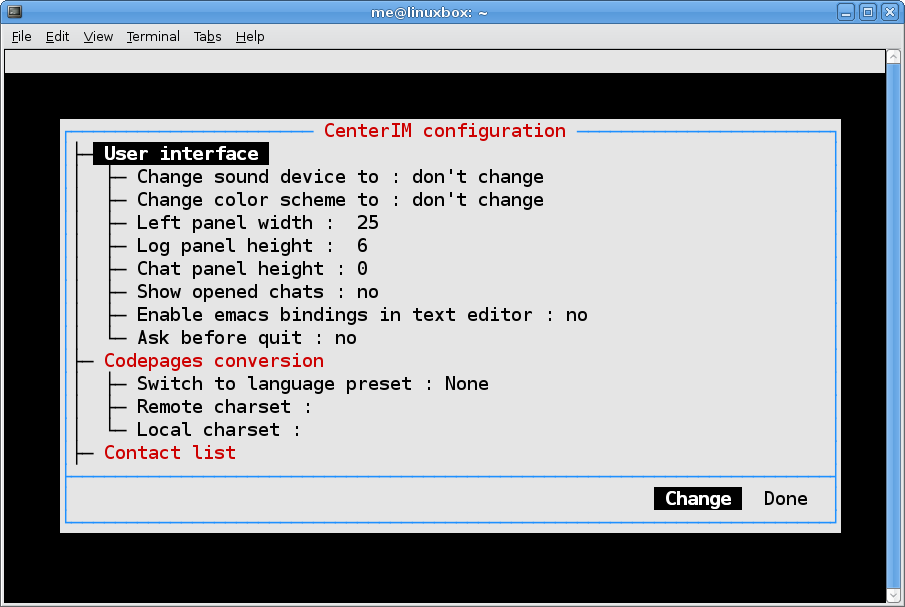
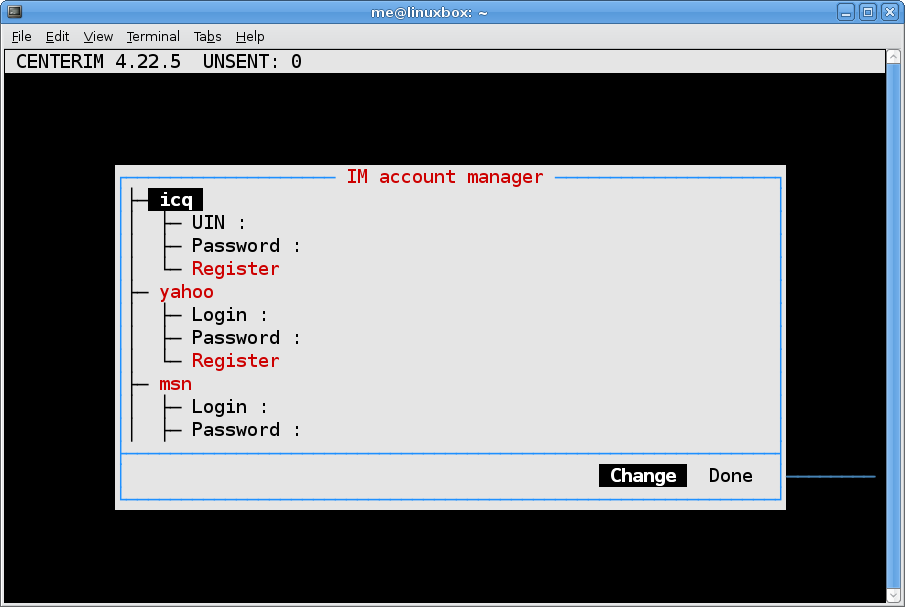
To demonstrate centerim in action, we'll configure an AIM account. On the second configuration screen, we'll scroll down until we get to the AIM protocol:
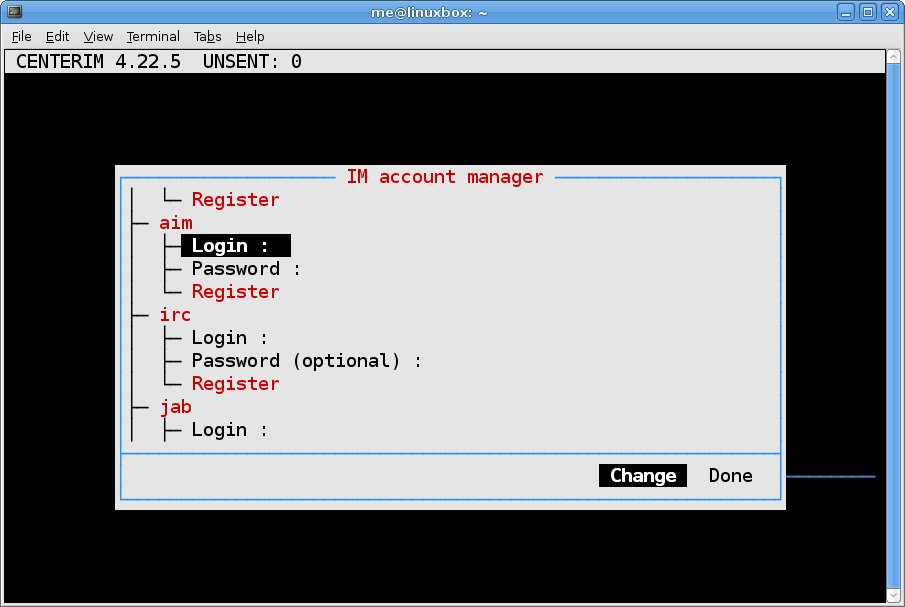
Next, we'll enter our account information including our AIM screen name and password:
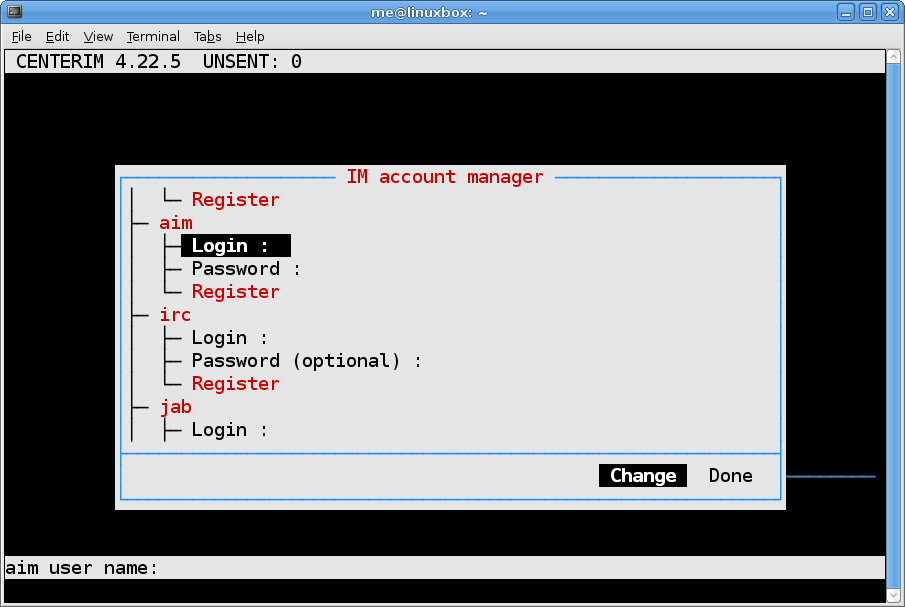
After we have the account defined, we use the right arrow key to select "Done." Next, centerim displays our chat window:
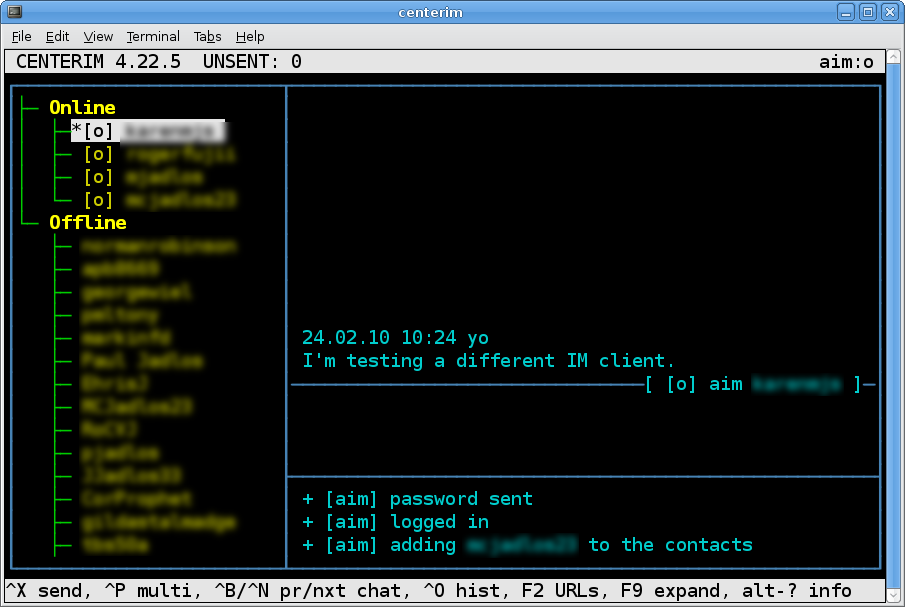
Pressing the Esc key twice will take you to the top level menu and from there you can go back to the configuration screens (F4) or quit the program (q).
Further Reading
Centerim and centericq:
Other installments in this series: 1 2 3 4 5 6 7 8 9 10 11 12 13 14
There are many popular messaging protocols such as AIM (AOL Instant Messenger), Jabber, MSN, IRC, and others and many client programs that support one or more of these protocols. Many Linux users are familiar with Pidgin, a graphical, multi-protocol, messaging client.
In this installment, we will install a text-based analog to Pidgin called centerim, a fork of an earlier messaging client program called centericq.
On our Debian workstation, we can easily install centerim this way:
me@linuxbox:~$ sudo apt-get install centerim
After the program is installed, we can invoke it like so:
me@linuxbox:~$ centerim
The first time centerim runs, it displays a two-part configuration screen which is used to configure accounts and other stuff:
To demonstrate centerim in action, we'll configure an AIM account. On the second configuration screen, we'll scroll down until we get to the AIM protocol:
Next, we'll enter our account information including our AIM screen name and password:
After we have the account defined, we use the right arrow key to select "Done." Next, centerim displays our chat window:
Pressing the Esc key twice will take you to the top level menu and from there you can go back to the configuration screens (F4) or quit the program (q).
Further Reading
Centerim and centericq:
- http://en.wikipedia.org/wiki/Centerim
- http://www.centerim.org
- http://www.centerim.org/index.php/Documentation
- http://thekonst.net/centericq/
Friday, February 5, 2010
Project: Building An All-Text Linux Workstation - Part 10
In this installment, we'll finish up our look at email.
Now that we have mutt talking to the outside world, it would be handy if we could also send messages from the command line as we did in Part 8 using the mail command. Fortunately, mutt supports the same technique.
Using mutt On The Command Line
We can send the output of a command to a remote email recipient via our POP3 configuration using a command such as this:
Here we used the alias "mutt-p" described in the previous installment. Please note that if such an alias were used in a shell script, it would most likely fail because the .bashrc file where the alias is defined is not sourced by the copy of the shell executing the script. In such a case, we would need to spell the command out fully:
Another Mail Client
While Debian installs mutt by default, it's not the only full-featured text-based email client available. Another popular choice is Alpine, the successor to the popular PINE email client from the University of Washington. Alpine is similar to mutt in most respects though I think it has an easier user interface:

In addition to the usual email functions, Alpine also sports its own address book and Alpine's configuration is adjustable from within the user interface so that editing the configuration files is not strictly necessary, but its configuration is as complicated as mutt's.

Alpine configuration, top-level

Alpine configuration, down deep
Summing Up
Text-based email clients have a long and storied history in the Unix world and remain the tools of choice for serious email users. As you dig deeper into the documentation of mutt and Alpine, you will find that nothing compares to the configurability of either of these programs.
Further Reading
More support resources for mutt:
Now that we have mutt talking to the outside world, it would be handy if we could also send messages from the command line as we did in Part 8 using the mail command. Fortunately, mutt supports the same technique.
Using mutt On The Command Line
We can send the output of a command to a remote email recipient via our POP3 configuration using a command such as this:
me@linuxbox:~$ ls -l | mutt-p -s "test message" someone@somewhere.com
Here we used the alias "mutt-p" described in the previous installment. Please note that if such an alias were used in a shell script, it would most likely fail because the .bashrc file where the alias is defined is not sourced by the copy of the shell executing the script. In such a case, we would need to spell the command out fully:
mutt -F ~/.muttrc-pop3 -s "test message" someone@somewhere.com
Another Mail Client
While Debian installs mutt by default, it's not the only full-featured text-based email client available. Another popular choice is Alpine, the successor to the popular PINE email client from the University of Washington. Alpine is similar to mutt in most respects though I think it has an easier user interface:

In addition to the usual email functions, Alpine also sports its own address book and Alpine's configuration is adjustable from within the user interface so that editing the configuration files is not strictly necessary, but its configuration is as complicated as mutt's.

Alpine configuration, top-level

Alpine configuration, down deep
Summing Up
Text-based email clients have a long and storied history in the Unix world and remain the tools of choice for serious email users. As you dig deeper into the documentation of mutt and Alpine, you will find that nothing compares to the configurability of either of these programs.
Further Reading
More support resources for mutt:
- http://mutt.blackfish.org.uk/
- http://therandymon.com/woodnotes/mutt/using-mutt.html
- http://hacktux.com/mutt/addressbook
- http://mark.stosberg.com/Tech/mutt.html
- http://www.washington.edu/alpine/
- http://www.washington.edu/alpine/tech-notes/config.html
- http://www.ii.com/internet/messaging/pine/
Wednesday, February 3, 2010
Project: Building An All-Text Linux Workstation - Part 9
In our previous installment we saw how our Debian workstation supports email between users on the system. This time we're going to add the ability to send and receive email over the Internet.
One of the reasons that email is such a difficult subject to cover is that there are so many different kinds of email tools and configurations. For this lesson, we are going to create a really simple configuration designed to satisfy the basic needs of a residential user. It is certainly possible to create a much more sophisticated configuration. In fact, with Linux, almost any kind of email setup is possible, including huge enterprise-class solutions.
As we saw last time, our email client, mutt, reads mail messages that it finds in a mailbox file located in /var/mail. To send mail, mutt passes a composed message to the exim mail transport agent (MTA) for delivery. So how do we send mail to the outside world?
The Traditional Way
The traditional way is to configure the MTA to communicate with a smarthost, a remote server that can determine where the remote recipient's mailbox is located and pass the messages to it. Such a configuration can be easily created in Debian by telling the package installer to reconfigure the exim4 package using a script built into the package. This technique is good if your workstation is on a corporate network and you have a mail server through which mail from all users is sent and received. You can find a complete description of this configuration process here.
Receiving mail is traditionally done by either configuring the MTA to receive incoming connections from other mail servers, or by running a mail delivery agent program (such as fetchhmail or getmail) that copies the contents of remote mailboxes to the local mailbox.
However, the traditional approach is not well suited to our residential workstation because each user may have different email providers, so we need a solution that is potentially different for each user. Of course, with enough configuration, the traditional approach can be made to work, but it wouldn't be pretty.
The Client Centric Way
For those of you who have used GUI-based email clients like Evolution or Thunderbird, the traditional way probably seems very alien and complex. You have likely used a single email client program that performs all the functions of the multi-program traditional method. That's the approach that we'll try to take. Too bad mutt makes it so hard.
The designers of mutt have taken the fairly stern view that a mail user agent (MUA) should be a mail user agent and nothing more. In recent years however, they have softened their stance on this issue somewhat and now offer optional support for SMTP (Simple Mail Transport Protocol) to communicate with smarthosts and POP and IMAP support for reading mail on remote servers. Fortunately, the version of mutt supplied with Debian has these optional features compiled in.
In the exercise that follows, we are going to configure mutt to use a POP3 server and an external smarthost, and an IMAP server and an external smarthost. By leaving the configuration of exim unchanged, we will continue to send and receive local mail. Note that you will need to adjust the configuration files listed below to fit your ISP's specific requirements.
POP3 Configuration
The Post Office Protocol (POP) is an older and less sophisticated mail delivery system. It is common among residential ISPs. To configure mutt to download messages from a remote POP3 (POP version 3, the version most often used today) and to send messages via a remote SMTP server acting as the smarthost, we will create a mutt configuration file and name it ~/.muttrc-pop3:
### POP3 setup for incoming mail
# File where incoming messages will be kept
set spoolfile=~/mailbox-pop3
# Your user name as understood by your ISP
set pop_user = "username"
# Your password as understood by your ISP
set pop_pass = "password"
# Host name of ISP's POP3 server
set pop_host = "mail.your_isp.com"
# Do not delete messages from POP3 server after downloading.
# Change to "yes" after testing.
set pop_delete = no
### SMTP setup for outgoing mail
# URL of ISP's SMTP server
set smtp_url = "smtp://username@mail.your_isp.com/"
# Password for SMTP server
set smtp_pass = "password"
# Your email address as understood by your ISP
set from = "username@your_isp.com"
# How you want your name to appear in email messages
set realname = "Your Name"
To execute this configuration, we invoke mutt this way:
me@linuxbox:~$ mutt -F ~/.muttrc-pop3
IMAP Configuration
If you have a good ISP, they will offer Internet Message Access Protocol (IMAP) on their mail server. IMAP keeps your mail on the server and allows you to maintain multiple folders and has a host of other features lacking in the POP system. In the configuration below, we will communicate with a remote IMAP server using SSL for encryption. We will call this configuration file ~/.muttrc-imap.
Note: In order to use SSL authentication, make sure you have the libsasl2-modules package installed on your system.
### IMAP setup for incoming mail
# Your email address as understood by your ISP
set imap_user = "username@your_isp.com"
# Your account password
set imap_pass = "password"
# Name of your ISP's IMAP server and folder locations
set folder = "imaps://mail.your_isp.com:993"
set spoolfile = "+INBOX"
set postponed="+/Drafts"
### SMTP setup for outgoing mail (using SSL)
# URL of ISP's SMTP server including SSL (smtps://) and port
# number (:465) as needed.
set smtp_url = "smtps://username@mail.your_isp.com:465/"
# Password for SMTP server
set smtp_pass = "password"
# Your email address as understood by your ISP
set from = "username@your_isp.com"
# How you want your name to appear in email messages
set realname = "Your Name"
### Files needed to store IMAP cache and SSL certificates
set header_cache=~/.mutt/cache/headers
set message_cachedir=~/.mutt/cache/bodies
set certificate_file=~/.mutt/certificates
To use this configuration, we need to create the directories for the IMAP cache and for SSL certificate storage. We can create them with the following command:
me@linuxbox:~$ mkdir -p ~/.mutt/cache/bodies
To execute this configuration, we invoke mutt like this:
me@linuxbox:~$ mutt -F ~/.muttrc-imap
Using Aliases To Support Multiple Configurations
We can simplify the invocation of mutt by adding these two lines to our ~/.bashrc file:
alias mutt-p='mutt -F ~/.muttrc-pop3'
alias mutt-i='mutt -F ~/.muttrc-imap'
There you have it. We now have mutt commands for handling local mail (mutt), POP3 mail (mutt-p) and IMAP mail (mutt-i).
Further Reading
Background on mail protocols:
Mutt configuration samples:
Other installments in this series: 1 2 3 4 5 6 7 8 9 10 11 12 13 14
One of the reasons that email is such a difficult subject to cover is that there are so many different kinds of email tools and configurations. For this lesson, we are going to create a really simple configuration designed to satisfy the basic needs of a residential user. It is certainly possible to create a much more sophisticated configuration. In fact, with Linux, almost any kind of email setup is possible, including huge enterprise-class solutions.
As we saw last time, our email client, mutt, reads mail messages that it finds in a mailbox file located in /var/mail. To send mail, mutt passes a composed message to the exim mail transport agent (MTA) for delivery. So how do we send mail to the outside world?
The Traditional Way
The traditional way is to configure the MTA to communicate with a smarthost, a remote server that can determine where the remote recipient's mailbox is located and pass the messages to it. Such a configuration can be easily created in Debian by telling the package installer to reconfigure the exim4 package using a script built into the package. This technique is good if your workstation is on a corporate network and you have a mail server through which mail from all users is sent and received. You can find a complete description of this configuration process here.
Receiving mail is traditionally done by either configuring the MTA to receive incoming connections from other mail servers, or by running a mail delivery agent program (such as fetchhmail or getmail) that copies the contents of remote mailboxes to the local mailbox.
However, the traditional approach is not well suited to our residential workstation because each user may have different email providers, so we need a solution that is potentially different for each user. Of course, with enough configuration, the traditional approach can be made to work, but it wouldn't be pretty.
The Client Centric Way
For those of you who have used GUI-based email clients like Evolution or Thunderbird, the traditional way probably seems very alien and complex. You have likely used a single email client program that performs all the functions of the multi-program traditional method. That's the approach that we'll try to take. Too bad mutt makes it so hard.
The designers of mutt have taken the fairly stern view that a mail user agent (MUA) should be a mail user agent and nothing more. In recent years however, they have softened their stance on this issue somewhat and now offer optional support for SMTP (Simple Mail Transport Protocol) to communicate with smarthosts and POP and IMAP support for reading mail on remote servers. Fortunately, the version of mutt supplied with Debian has these optional features compiled in.
In the exercise that follows, we are going to configure mutt to use a POP3 server and an external smarthost, and an IMAP server and an external smarthost. By leaving the configuration of exim unchanged, we will continue to send and receive local mail. Note that you will need to adjust the configuration files listed below to fit your ISP's specific requirements.
POP3 Configuration
The Post Office Protocol (POP) is an older and less sophisticated mail delivery system. It is common among residential ISPs. To configure mutt to download messages from a remote POP3 (POP version 3, the version most often used today) and to send messages via a remote SMTP server acting as the smarthost, we will create a mutt configuration file and name it ~/.muttrc-pop3:
### POP3 setup for incoming mail
# File where incoming messages will be kept
set spoolfile=~/mailbox-pop3
# Your user name as understood by your ISP
set pop_user = "username"
# Your password as understood by your ISP
set pop_pass = "password"
# Host name of ISP's POP3 server
set pop_host = "mail.your_isp.com"
# Do not delete messages from POP3 server after downloading.
# Change to "yes" after testing.
set pop_delete = no
### SMTP setup for outgoing mail
# URL of ISP's SMTP server
set smtp_url = "smtp://username@mail.your_isp.com/"
# Password for SMTP server
set smtp_pass = "password"
# Your email address as understood by your ISP
set from = "username@your_isp.com"
# How you want your name to appear in email messages
set realname = "Your Name"
To execute this configuration, we invoke mutt this way:
me@linuxbox:~$ mutt -F ~/.muttrc-pop3
IMAP Configuration
If you have a good ISP, they will offer Internet Message Access Protocol (IMAP) on their mail server. IMAP keeps your mail on the server and allows you to maintain multiple folders and has a host of other features lacking in the POP system. In the configuration below, we will communicate with a remote IMAP server using SSL for encryption. We will call this configuration file ~/.muttrc-imap.
Note: In order to use SSL authentication, make sure you have the libsasl2-modules package installed on your system.
### IMAP setup for incoming mail
# Your email address as understood by your ISP
set imap_user = "username@your_isp.com"
# Your account password
set imap_pass = "password"
# Name of your ISP's IMAP server and folder locations
set folder = "imaps://mail.your_isp.com:993"
set spoolfile = "+INBOX"
set postponed="+/Drafts"
### SMTP setup for outgoing mail (using SSL)
# URL of ISP's SMTP server including SSL (smtps://) and port
# number (:465) as needed.
set smtp_url = "smtps://username@mail.your_isp.com:465/"
# Password for SMTP server
set smtp_pass = "password"
# Your email address as understood by your ISP
set from = "username@your_isp.com"
# How you want your name to appear in email messages
set realname = "Your Name"
### Files needed to store IMAP cache and SSL certificates
set header_cache=~/.mutt/cache/headers
set message_cachedir=~/.mutt/cache/bodies
set certificate_file=~/.mutt/certificates
To use this configuration, we need to create the directories for the IMAP cache and for SSL certificate storage. We can create them with the following command:
me@linuxbox:~$ mkdir -p ~/.mutt/cache/bodies
To execute this configuration, we invoke mutt like this:
me@linuxbox:~$ mutt -F ~/.muttrc-imap
Using Aliases To Support Multiple Configurations
We can simplify the invocation of mutt by adding these two lines to our ~/.bashrc file:
alias mutt-p='mutt -F ~/.muttrc-pop3'
alias mutt-i='mutt -F ~/.muttrc-imap'
There you have it. We now have mutt commands for handling local mail (mutt), POP3 mail (mutt-p) and IMAP mail (mutt-i).
Further Reading
Background on mail protocols:
- http://en.wikipedia.org/wiki/Post_Office_Protocol
- http://en.wikipedia.org/wiki/Imap
- http://en.wikipedia.org/wiki/Simple_Mail_Transfer_Protocol
Mutt configuration samples:
Other installments in this series: 1 2 3 4 5 6 7 8 9 10 11 12 13 14
Subscribe to:
Posts (Atom)


 Posts
Posts

